How to Train Staff to Measure Kids’ Optical Frames for Accurate Sizing?
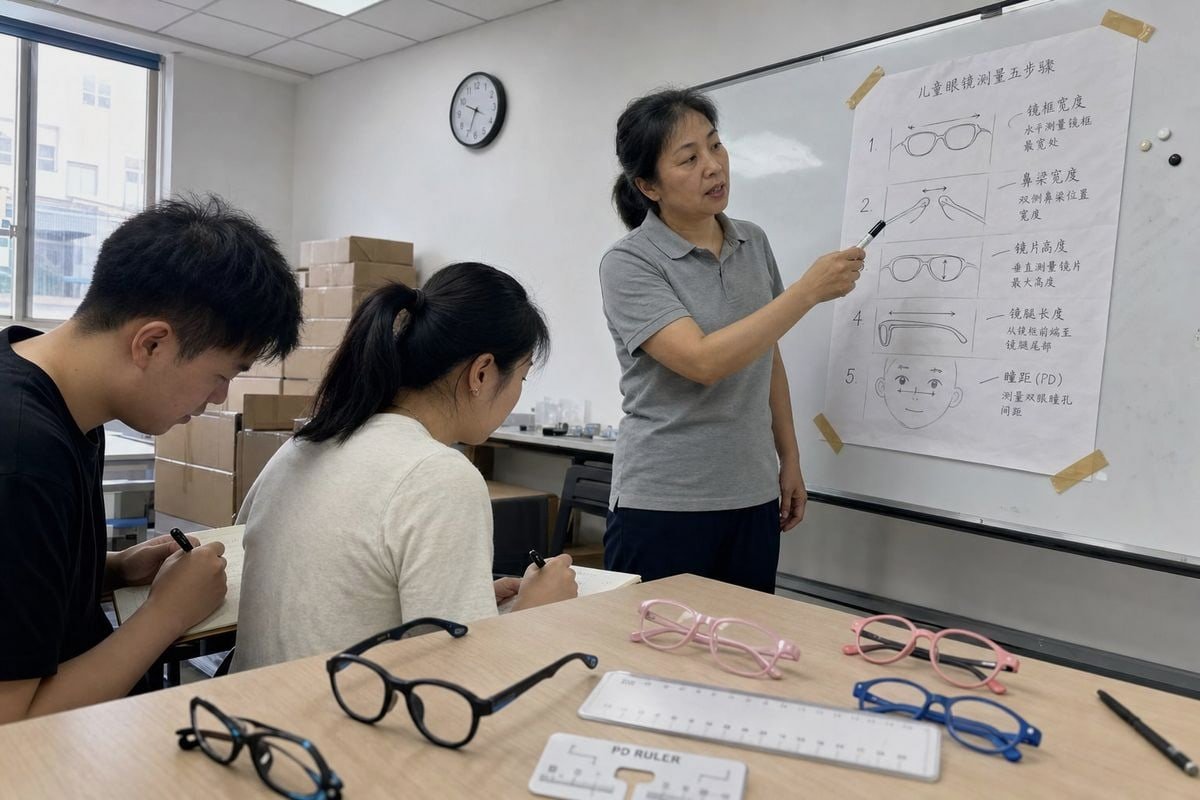
Teaching staff to measure kids’ optical frames sounds simple until a four-year-old refuses to sit still monocular pupillary distance 1. At our Taizhou factory, we hear this frustration from optical buyers constantly. Poorly trained fitting means returns, slipping frames, and parents who never come back. The fix is a repeatable training system — and after 15 years building TR90 and TPEE children’s frames for brands in 20+ countries, I can show you exactly how to build one.
Train staff to measure kids’ optical frames by teaching five core measurements first — lens width, bridge width, temple length, pupillary distance, and fitting height — then pairing those numbers with child-friendly tools, a written sizing checklist, and post-fit adjustment skills verified on the child’s face.
Below, I break this into four training modules. Each one covers what to teach, which tools to hand out, and the mistakes I see most often in the field.
What Measurements Should I Teach My Staff to Take First When Fitting Kids' Frames?
A distributor in Australia once returned a full shipment because their new staff ordered by lens width alone. That costly lesson taught me: measurement training must start with the full picture.
Staff should first learn the Boxing System — lens width (A), lens height (B), and distance between lenses (DBL) — followed by temple length, monocular pupillary distance, and fitting height. All values are recorded in millimeters and checked against the child's face, not just the frame label.
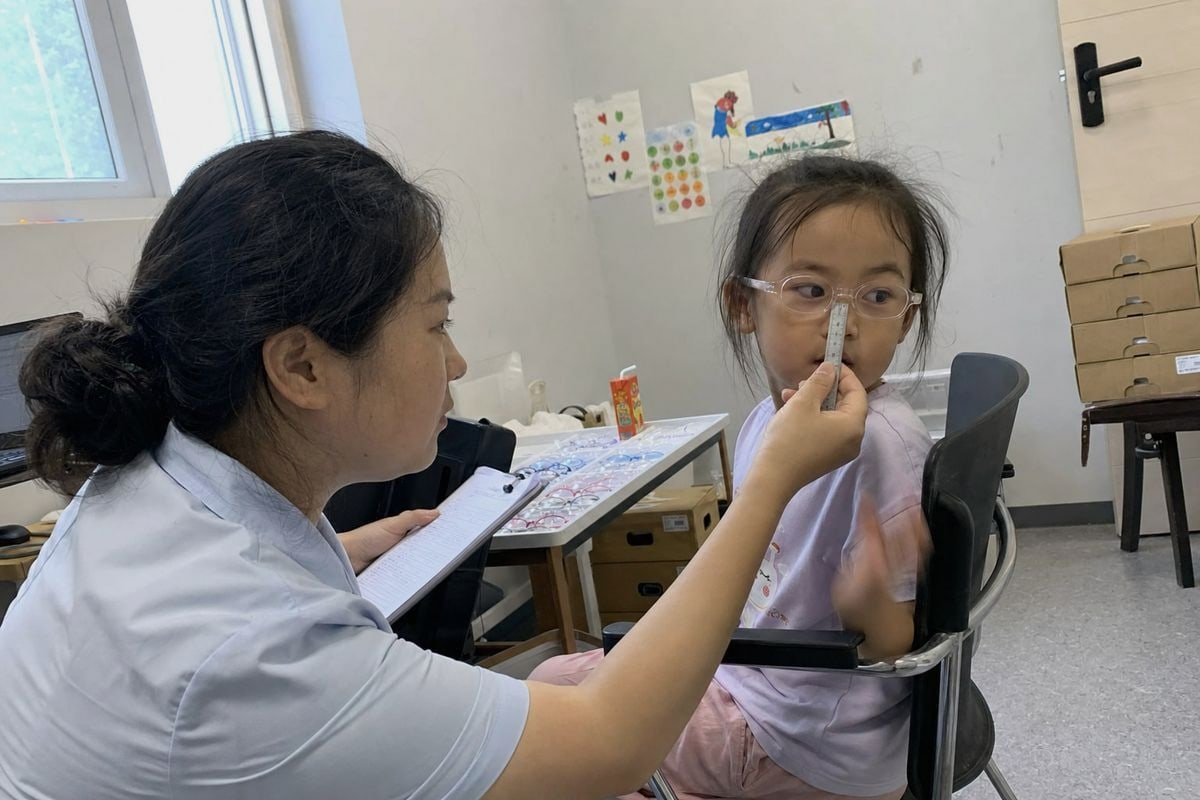
Pediatric dispensing techniques 2 differ from adult fitting because children's faces are still developing. Their nasal bridges are flatter, their ears sit differently, and their facial symmetry is less predictable. So your staff cannot rely on adult habits. They need a defined measurement order that works even when the child moves.
The Core Measurement Sequence
I recommend teaching measurements in this order, because each step builds on the last:
- Frame width and lens width (A measurement) — the frame front should match the width of the child's face without pressing the temples outward.
- Bridge width and fit (DBL) — the most critical number in pediatric work, because a child's underdeveloped nasal bridge carries most of the frame's weight.
- Comprimento da haste — measured from the hinge to the top of the ear, with the bend starting exactly at the ear's apex.
- Pupillary distance measurement — monocular PD whenever possible, since children's faces often develop asymmetrically.
- Fitting height / vertical centration — essential for stronger prescriptions, where small errors create unwanted prism.
Quick Reference for Staff Training
| Medição | What It Controls | Why It Matters More for Kids |
|---|---|---|
| Lens width (A) | Horizontal lens size | Kids' eyes must center in smaller lenses |
| Bridge width (DBL) | Weight distribution on nose | Flat pediatric bridges cause sliding |
| Comprimento da haste | Grip behind the ear | Kids move constantly; grip prevents slippage |
| Monocular PD | Optical center alignment 3 | Facial asymmetry is common in children |
| Fitting height | Vertical centration | Strong Rx magnifies vertical errors |
Teach staff that these fitting parameters for children 4 work together. A perfect PD means nothing if the bridge lets the frame slide down 5 mm. That is why our engineers design frames with adjustable silicone bridge contact — the anatomical bridge position on a young child simply cannot support a rigid adult-style bridge.
Which Tools Do I Need to Provide My Team for Accurate Children's Sizing?
When we run fit-testing sessions on sample frames before mass production, our QC team uses a surprisingly short tool list. Expensive equipment helps, but consistency matters more than cost.
Equip your team with a millimeter PD ruler, a pupilometer for monocular readings, a penlight for corneal reflex checks, a frame warmer for temple length adjustment, and marking pens for fitting height. Optional digital centration tools help with children who cannot sit still.
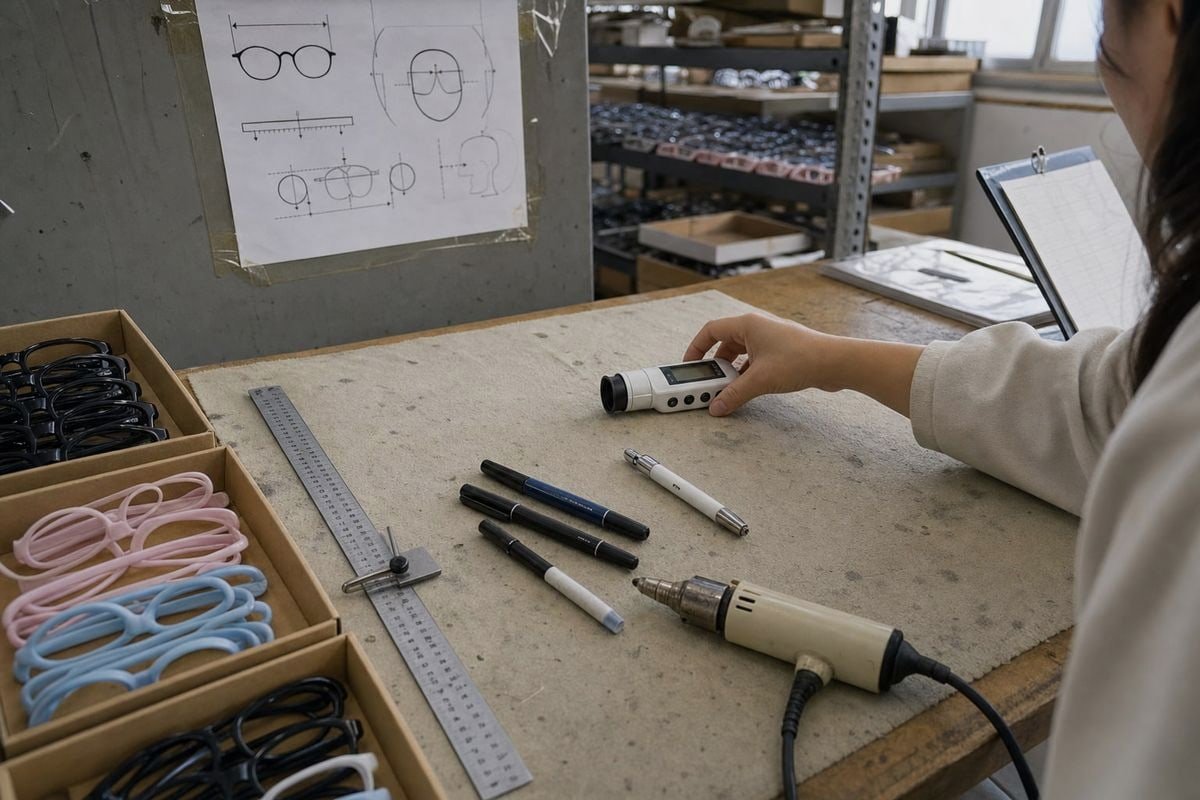
The tool question always raises a buyer objection I hear from optical companies: "Can't parents just measure at home with a printable ruler?" My honest answer is no — not for prescription work. Home measurement gives a rough size estimate, but professional dispensing needs verified optical center alignment and a final adjustment on the child's face. That is why staff tools and staff training remain the standard, and why we always recommend our optical retail partners invest in a proper toolkit.
The Essential Toolkit, Tiered by Budget
| Tier | Tools | Melhor Para |
|---|---|---|
| Basic | Millimeter PD ruler, penlight, marking pen | New shops, low volume |
| Padrão | Pupilometer, frame warmer, adjustment pliers with nylon jaws | Most optical retailers |
| Advanced | Digital centration device, 3D facial scanning | High-energy kids, high-Rx work |
Why the Penlight Deserves Special Training
A pupilometer assumes the child will hold still and fixate. Many will not. Teach staff the corneal reflex method 5: hold a penlight at your eye, ask the child to look at the light, and mark the reflection points on the demo lenses. It takes seconds. For pre-verbal children, canthus-to-canthus estimates work as an accepted fallback.
Sensory-Friendly Considerations
Some children — especially neurodivergent kids — react badly to face-contact tools and clicking adjustment sounds. Provide non-contact options where possible, and train staff to perform quiet, off-face frame adjustments. In our own product development, this insight pushed us toward flexible TPEE temples that can be shaped gently by hand, without loud heating equipment near a nervous child.
Finally, remind staff that no tool replaces observation. A digital scanner can capture vertex distance and pantoscopic tilt precisely, but only a trained human notices that the child tilts her head down when reading a tablet.
How Can I Create a Simple Sizing Guide My Staff Can Follow Every Time?
Our oficina gerenciada por 5S 6 taught me something that applies directly to optical retail: written standards beat memory. When 120 workers follow one checklist, quality stays consistent. Your fitting counter deserves the same discipline.
Create a one-page laminated checklist covering the fitting triangle, eye-level measurement posture, monocular PD, bridge contact, temple reach, and a dynamic movement test. Require staff to complete every line before ordering, and re-verify the fit at pickup.
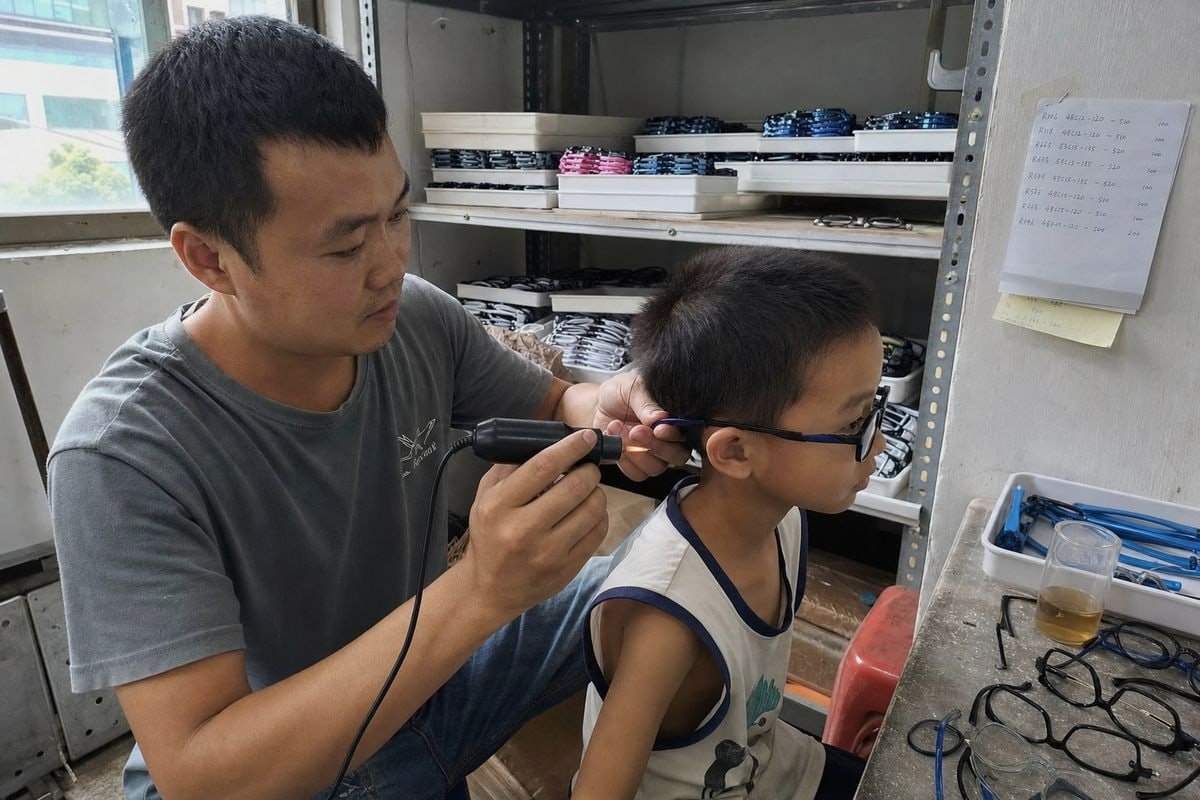
A good sizing guide turns pediatric dispensing techniques into a repeatable routine. The goal is not a perfect single number. The goal is a process every staff member follows the same way, whether the child cooperates or squirms.
The Fitting Triangle Rule
Build your guide around one central principle: a correctly sized frame touches the child only at three points — the nose and the top of each ear. Contact anywhere else means the size is wrong or the frame alignment standards 7 were not met. This "fitting triangle" gives staff a fast visual check that requires no tools at all.
A Checklist Template You Can Adapt
| Step | Verifique | Pass Criteria |
|---|---|---|
| 1 | Sit at the child's eye level | Never measure from above; adult chairs skew fitting height |
| 2 | Fitting triangle | Contact only at nose and ear tops |
| 3 | Eye centering | Pupils centered horizontally and vertically in each lens |
| 4 | Bridge width and fit | No gap, no pinching; weight spread across the nose |
| 5 | Temple check | Bend starts at the ear's apex; no outward bowing |
| 6 | Monocular PD recorded | Both values written in millimeters |
| 7 | Dynamic fit test | No slipping while the child plays or looks at a tablet |
| 8 | Cross-reference | Compare A, B, and DBL against current well-fitting frames |
Train the Dynamic Fit Test
Static measurement misses real-world behavior. Have the child jump, look down at a tablet, or shake their head. Watch for slippage points. Our flexible TR90 frames with TPEE temples were designed around exactly this reality — active kids test glasses harder than any adult ever will. Your staff should test the same way.
Also teach the cross-reference habit: when a child already owns well-fitting glasses, record their A, B, and DBL numbers as a sizing baseline before showing new frames.
What Common Fitting Mistakes Should I Train My Staff to Avoid?
Reviewing warranty returns from our optical partners over the years revealed a clear pattern. Most "defective" frames were not defective at all. They were mis-measured or never adjusted after dispensing.
Train staff to avoid five errors: measuring from adult height instead of the child's eye level, using binocular PD on asymmetric faces, ignoring temple bow, skipping vertical centration on strong prescriptions, and treating measurement as final without post-wear adjustment and pickup verification.
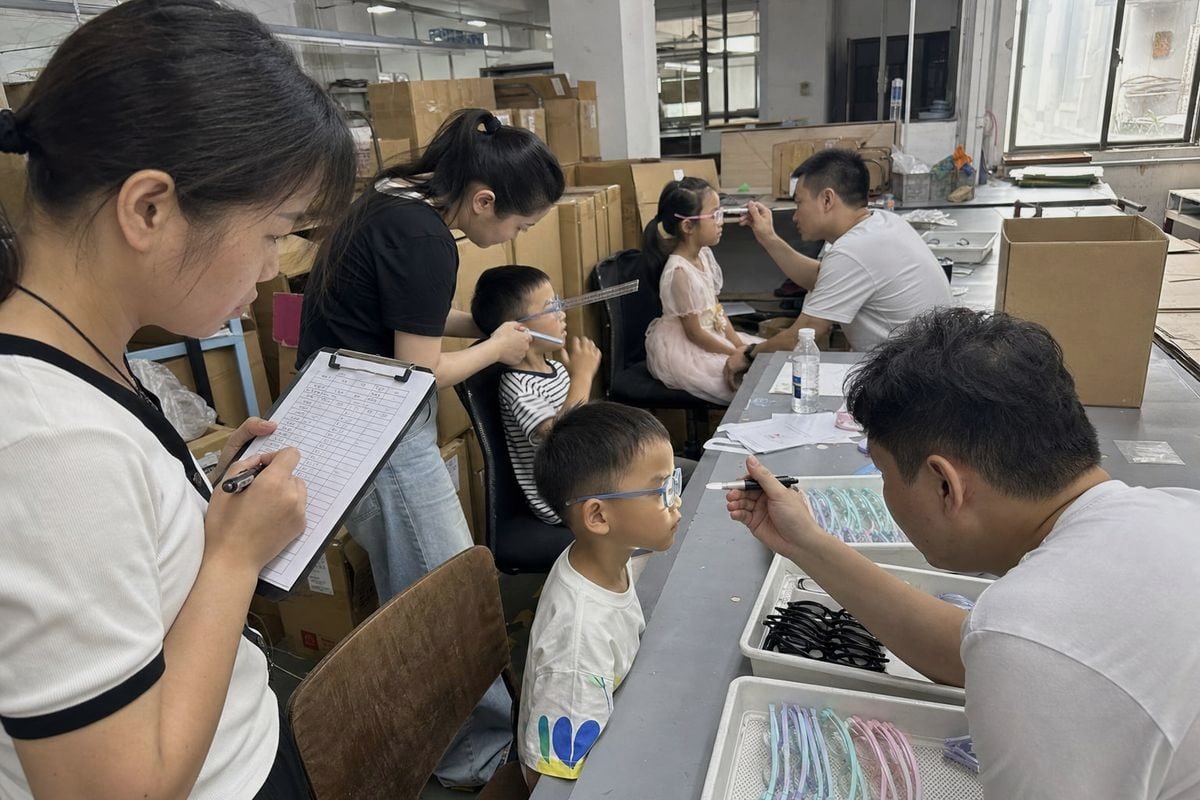
Every mistake below is preventable with training. I list them in the order of how often I see them cause returns.
Mistake 1: Measuring From the Wrong Posture
Staff who stand over a seated child record a skewed fitting height. Natural posture measurement means sitting at the child's eye level and letting the child hold a normal head position. This one habit change improves segment height accuracy immediately.
Mistake 2: Skipping Monocular PD
A binocular pupillary distance measurement assumes a symmetrical face. Many children do not have one. Splitting the measurement per eye protects optical center alignment, especially in stronger prescriptions where decentration creates unwanted prism.
Mistake 3: Ignoring Temple Bow
If the temple arms flare outward when worn, the frame is too narrow. The child will get red pressure marks, and the glasses will creep forward, increasing vertex distance and degrading the prescription's effect. Teach staff to check temple spread from above the child's head.
Mistake 4: Forgetting Vertical Centration
For higher prescriptions and high-index lenses, small vertical errors carry big optical consequences. Staff should mark fitting height with the frame adjusted and worn — not flat on a table.
Mistake 5: Treating the Sale as the Finish Line
A pediatric fit is a process, not a measurement. Final pantoscopic tilt, nose contact, and temple bend must be refined after the child wears the frame. And when a child was too uncooperative for precise in-chair numbers, a "best estimate plus pickup verification" approach beats forcing a stressed child through repeated attempts. Build a mandatory re-check at delivery into your workflow — adjustments change effective height and alignment, so the pickup appointment is where accuracy is truly confirmed.
Conclusão
Untrained staff cost you returns and trust. Train them on core measurements, proper tools, a written checklist, and post-fit adjustment — and kids' optical frames will fit right every time.
Notas de rodapé
1. Explains the pupillary distance concept central to this measurement step. ↩︎
2. CDC provides authoritative background on children’s vision health relevant to pediatric dispensing. ↩︎
3. WHO fact sheet gives global context on vision correction accuracy and optical alignment importance. ↩︎
4. NIH’s National Eye Institute offers authoritative guidance on pediatric vision fitting factors. ↩︎
5. Background on the corneal reflex technique referenced for PD estimation. ↩︎
6. Explains the 5S methodology used as the analogy for staff checklist discipline. ↩︎
7. Globally recognized reference providing an overview of technical fitting and alignment standards for spectacle frames. ↩︎
Mais Artigos que Você Pode Gostar

5 de agosto de 2026
Acetato de Celulose Bio-Baseado vs. Regular: Qual a Diferença para Armações Infantis?

5 de agosto de 2026
Quão Recicláveis São os Materiais de Armações Ópticas Infantis e Quais Alternativas Ecológicas Existem?
5 de agosto de 2026
As Armações Ópticas Infantis Branqueiam ou Envelhecem em Armazenamento e Como Controlar as Condições do Armazém?
Procurando um Parceiro Confiável em Óculos Infantis?
Explore mais de 800 estilos prontos e suporte completo OEM/ODM adaptado à sua marca.
Entre em Contato English
  Español de México
  Deutsch
  Français
  日本語
日本語  العربية
  Português do Brasil