How to Request Drilling Templates and Processing Parameters for Rimless Kids Optical Frames?
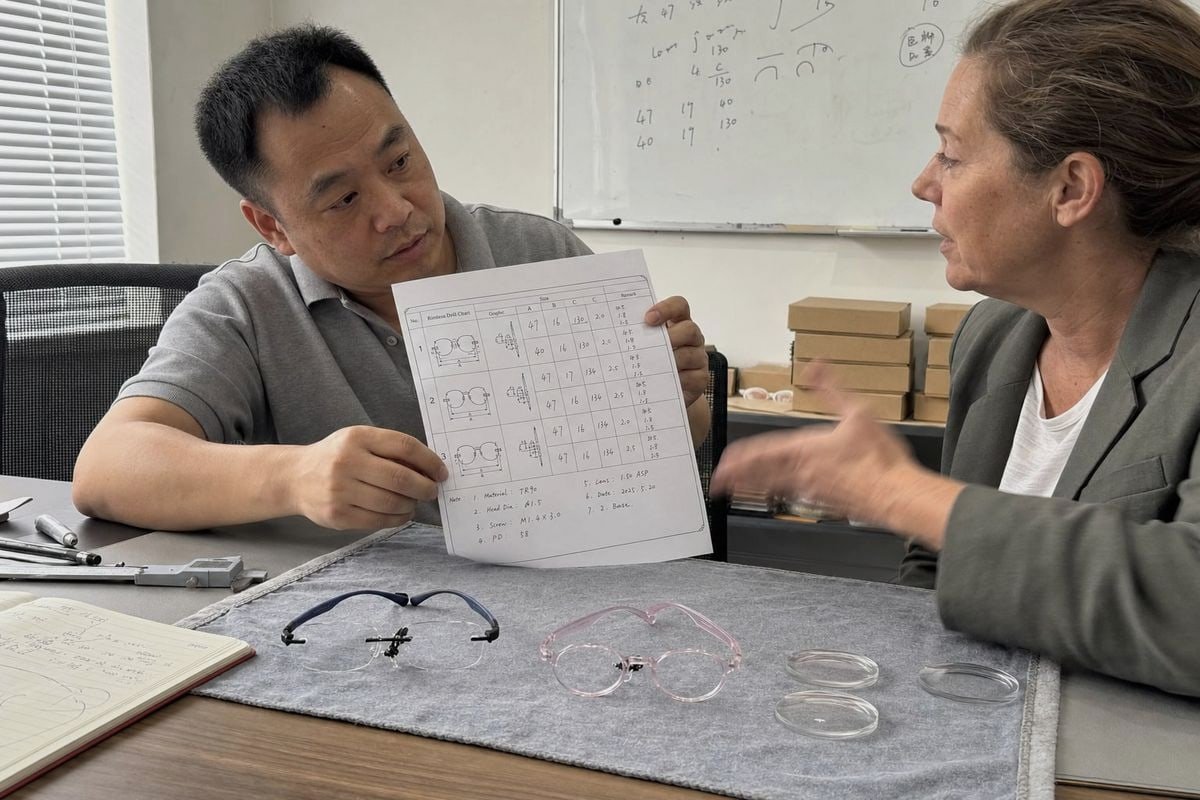
Drilling templates and processing parameters for rimless kids optical frames trip up many buyers we work with in our Taizhou factory impact-resistant lens materials 1. One wrong hole ruins a lens. Remakes pile up, launch dates slip, and your lab blames your frame supplier. The fix is simple: request the right files, in the right format, before you order.
To request drilling templates and processing parameters for rimless kids optical frames, ask your frame supplier for the model-specific 1:1 drill chart, drilling coordinates or OMA file, hole diameters, drill angles, minimum edge distance, and lens-material notes. Confirm these match your optical lab’s software before production.
That is the short answer. Below, I walk through each step in detail, from getting accurate templates to requesting fully customized drill data for your own brand designs.
How can I get accurate drilling templates for rimless kids optical frames before placing an order?
A buyer from Australia once asked us for "the drill template" for a rimless sample. Our engineers sent back three files, not one — and that surprised her. Here is why.
Request the exact model's drilling data package from the frame supplier before ordering: a printable 1:1 PDF drill chart, a digital coordinate or OMA file for lab edging software, and written drilling guide notes. Always specify the frame model, size, and collection, since hole positions vary by design.

A drilling template is not one single thing. In our experience supplying optical companies in 20+ countries, "template" can mean a paper chart, a digital shape file, or structured coordinate data. Each serves a different workflow, and a good supplier should provide all of them on request.
The three types of drill data you should ask for
Most rimless drill mount systems follow an industry approach where suppliers distribute mounting data as structured files — via a website, email, or a download portal — rather than paper only. Digital access is now the norm, and many suppliers organize files by model or collection.
| Data type | What it contains | Best used for |
|---|---|---|
| 1:1 printable drill chart (PDF) | Hole positions, axis marks, auxiliary marks at true scale | Manual drilling, visual verification |
| Drilling coordinates / OMA file format 2 | Machine-readable edging and drilling data | Automated edgers and optical lab software |
| Drilling guide notes | Drill diameter, angles, sequence, cautions | Technician instructions and QC |
When you request these files, be specific. Include the exact brand, model number, and collection name. Add the size or color code if the line has variants. State whether you need bridge marks, temporal marks, or full mounting data. Also mention your lens material, because drilling behavior changes with polycarbonate versus Trivex lens material 3.
One more practical tip from our workshop: always print the PDF chart at 1:1 with page scaling switched off, then verify the printed scale with a physical ruler. A chart printed at 97% scale looks correct but shifts every hole. That single check has saved our sampling team from more remakes than any other habit.
What processing parameters should I request to ensure my rimless frames are safe and durable for children?
There is a trade-off we weigh on every kids' rimless project: a thinner lens edge looks elegant, but a thicker edge survives playground impacts. Processing parameters decide which side wins.
Request the drill hole diameter, drill angle and orientation for each hole, minimum edge thickness at drill points, minimum distance from lens edge, safety beveling requirements, and material-specific drilling instructions. For children's frames, also specify impact-resistant lens materials like Trivex or polycarbonate.

Processing parameters are the numbers that keep a child's glasses in one piece. Rimless mounts concentrate all mechanical stress at a few small holes. Kids drop, bend, and sit on their glasses. So every parameter matters more here than in adult eyewear.
The core parameters checklist
| Parameter | Typical guidance | Por que é importante para crianças |
|---|---|---|
| Drill hole diameter | Model-specific (e.g., 1.4 mm or 2 mm systems) | Wrong diameter causes loose or cracked mounts |
| Drill angle | 90° to lens front unless specified; some temporal holes tilt ~3° | Wrong angle stresses the hole wall |
| Minimum edge thickness | Commonly 1.8–2.0 mm at drill points | Thin edges star-crack under impact |
| Edge distance | Drilling zone at least 2.5 mm from lens edge | Prevents fracture propagation to the rim |
| Position tolerance | Verify within ±0.5 mm before drilling | Misplaced holes cause frame twist |
| Hole finishing | Chamfer or micro-finish entry and exit | Reduces chipping and hairline fissures |
You may notice a tension here. Some commercial systems claim extremely tight alignment tolerances, while lens suppliers recommend a practical ±0.5 mm workshop check. Our view after 15 years of eyewear production is straightforward: claimed system precision never removes the need for manual verification. Ask for the manufacturer's spec, then apply the workshop check anyway.
Material and hardware notes
Polycarbonate has high notch sensitivity 4, so it needs a sharp burr, low drill speed, and light, controlled pressure to avoid heat damage and subsurface cracks. Trivex tolerates drilling better and suits active children. For hardware, we encourage buyers to prioritize compression bushings over screw-and-nut assemblies. Compression bushings absorb vibration, resist loosening during play, and cut long-term maintenance for parents. Finally, request safety beveling on all lens edges — a mandatory step for kids' eyewear in our workshop.
How do I confirm drilling and processing specifications match my lens supplier's requirements?
A remake taught us this lesson years ago: a lab drilled perfect holes at the wrong angle for a high-base-curve lens, and the temples splayed outward. The data never got cross-checked.
Share the frame supplier's drill chart, coordinates, and parameter sheet with your lens supplier or lab before cutting. Confirm file compatibility with their optical lab software, verify hole diameters against their hardware, and check that lens material, base curve, and edge thickness meet both parties' minimums.
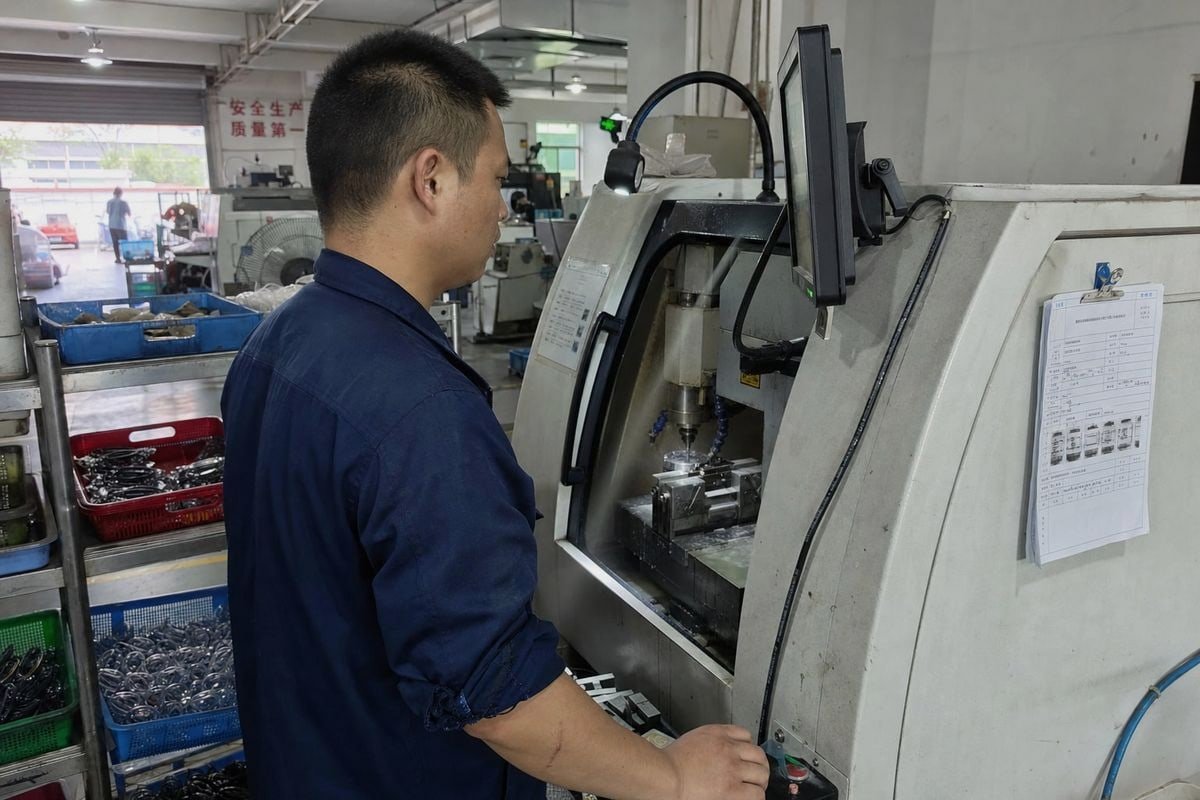
Confirmation is a three-way conversation between you, the frame maker, and the lens lab. Skipping it is the single biggest cause of rimless remakes we see. Here is the verification process our team recommends to buyers before any production run.
A five-step verification workflow
- Send the full file set to the lab early. Include the OMA file format data, the 1:1 PDF, and the written parameter notes. Ask the lab to load the digital shape files into their edging system and confirm they read correctly.
- Match hole diameter to hardware. A three-piece drill mount using compression bushings often needs a different hole size than a screw system. The lab must confirm their drill bits match the frame's spec exactly.
- Check base curve compatibility. For frames with a base curve 5 above 4.0, request 3D tracing data. Flat 2D coordinates on a curved lens shift the effective drill angle, causing temple splay or "X-ing" of the frame front.
- Verify left/right symmetry and orientation. Confirm which side is which before drilling, and confirm whether the lens is plano, single-vision, or progressive, since centration affects where holes sit relative to the optical center 6.
- Run one sample pair first. We always ask labs to mount one pair, stress-test the hinge points, and photograph the result before approving volume lens edging parameters.
Document every confirmation in writing. If a dispute happens later, the paper trail shows exactly which spec each party agreed to. In our export experience, this simple habit protects both the buyer and the lab relationship.
Can I request customized drilling templates for my brand's specific rimless frame designs?
When a Japanese kids' brand asked us to shift bridge-hole heights for smaller nasal anatomy, our tooling team produced revised drilling coordinates within the sampling stage. Customization is absolutely possible.
Yes. OEM/ODM frame manufacturers can create custom drill charts, drilling coordinates, and full parameter sheets for your proprietary rimless designs. You provide the design intent, target age group, and lens material; the factory delivers model-specific 1:1 charts, digital files, and drilling guide notes.
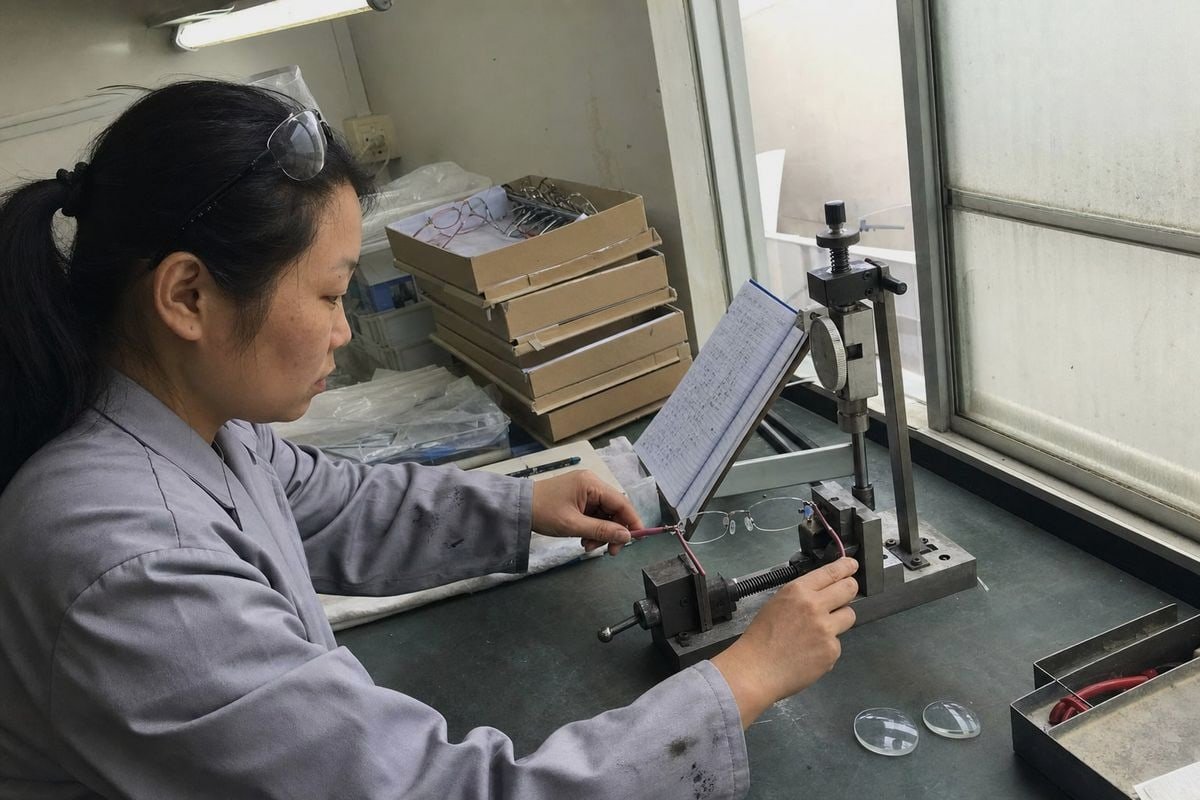
Custom drill data is a normal part of ODM development, not a special favor. At our factory, every new rimless or semi-rimless kids’ style gets its own documented drill package before mass production. Brands that start from our roughly 800 existing styles get the matching data package immediately, which lets them test the market without mold investment. Brands developing original designs get a new package built during sampling.
What you provide versus what the factory delivers
| You provide | The factory delivers |
|---|---|
| Design sketches or reference frames | Model-specific 1:1 drill chart (PDF) |
| Target age range and face-size data | Drilling coordinates and OMA-compatible files |
| Lens material preference (Trivex, polycarbonate) | Hole diameters, angles, and orientation notes |
| Hardware preference (bushings vs. screws) | Edge distance and minimum thickness spec |
| Your lab's software or format requirements | Drilling sequence and material cautions |
Kids-specific customizations worth requesting
Children's faces are not scaled-down adult faces. Two custom adjustments come up often in our development work. First, nasal-bridge compensation: adjusting the vertical height of bridge-mount holes to suit a child's flatter, lower nasal anatomy, keeping the optical center properly aligned. Second, growth-adaptive centration: using slightly generous lens shapes with offset drilling so the fit tolerates a small nasal-to-temporal shift as the child's pupillary distance 7 grows.
One honest caution: some marketing terms in this space — ultrasonic micro-sealing, AI stress-zone mapping — sound advanced but vary widely in real-world substance. Ask any supplier making such claims to explain the actual process and show sample results. Solid fundamentals — correct diameters, chamfered holes, adequate edge thickness, and verified coordinates — deliver most of the durability a child's frame needs.
Conclusão
Vague requests cause remakes; complete data packages prevent them. Request the 1:1 chart, coordinates, and full parameters, verify everything with your lab, and partner with a factory that documents it all.
Notas de rodapé
1. FDA guidance on eyewear safety supports impact-resistant material recommendations for children. ↩︎
2. ISO relevance for standardized machine-readable optical lab data formats. ↩︎
3. Explains material properties relevant to lens drilling behavior comparisons.
Mais Artigos que Você Pode Gostar

5 de agosto de 2026
Acetato de Celulose Bio-Baseado vs. Regular: Qual a Diferença para Armações Infantis?

5 de agosto de 2026
Quão Recicláveis São os Materiais de Armações Ópticas Infantis e Quais Alternativas Ecológicas Existem?
5 de agosto de 2026
As Armações Ópticas Infantis Branqueiam ou Envelhecem em Armazenamento e Como Controlar as Condições do Armazém?
Procurando um Parceiro Confiável em Óculos Infantis?
Explore mais de 800 estilos prontos e suporte completo OEM/ODM adaptado à sua marca.
Entre em Contato English
  Español de México
  Deutsch
  Français
  日本語
日本語  العربية
  Português do Brasil