¿Cuáles son las tolerancias de posición del centro óptico para las monturas ópticas infantiles?

Las tolerancias de posición del centro óptico para las monturas ópticas infantiles confunden a muchos compradores nuevos que conozco desarrollo de la visión binocular 1. En nuestra línea de producción, una montura que parece perfecta aún puede fallar para los ojos de un niño.
Las tolerancias de posición del centro óptico para las monturas ópticas infantiles definen cuánto puede separarse el centro de una lente de la pupila del niño. Los límites comunes son de 2 a 4 mm horizontalmente dependiendo del prisma, manteniendo el prisma inducido por debajo de 0.25–0.67 dioptrías prismáticas según las normas aplicables como ANSI Z80.1.
Eso suena técnico, pero es fácil de entender una vez desglosado. A continuación, repasaremos las normas, las razones por las que los niños necesitan un control más estricto y cómo inspeccionar las monturas antes del envío.
¿Cómo compruebo si la tolerancia del centro óptico cumple las normas de seguridad para monturas infantiles?
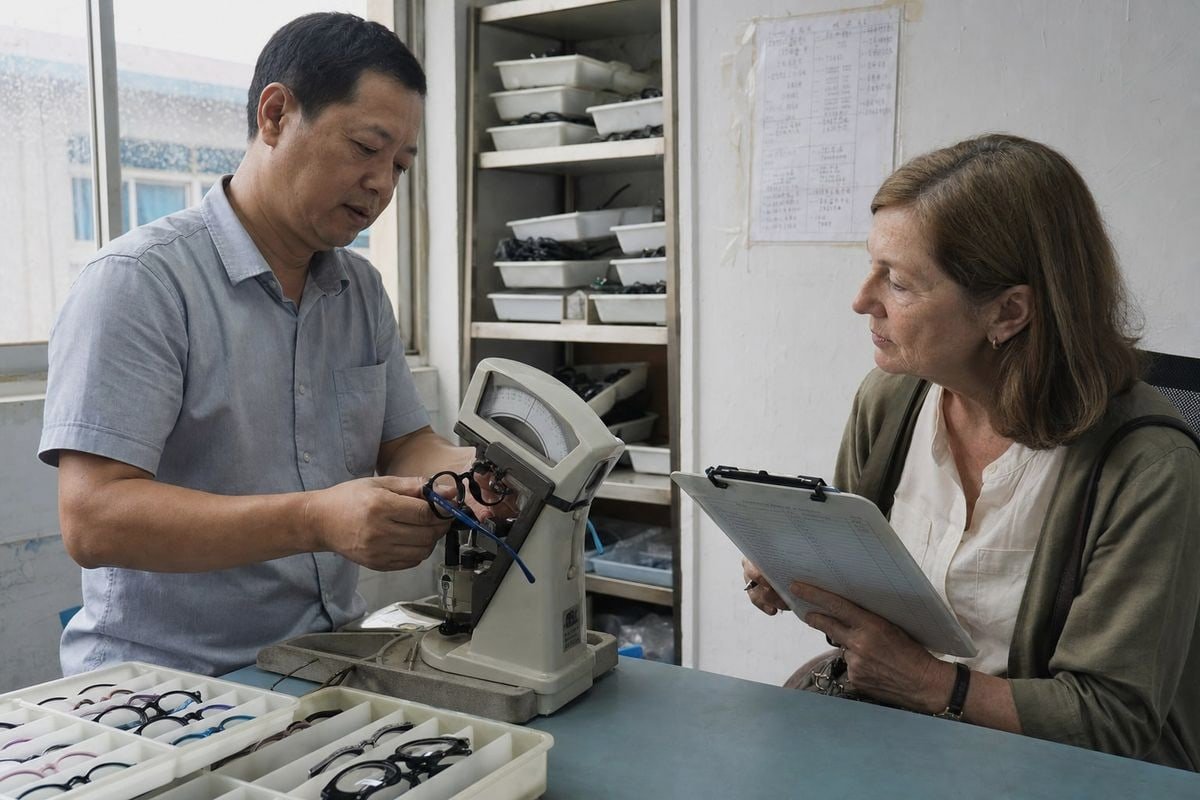
Una gerente de adquisiciones de Australia hizo a nuestro equipo exactamente esta pregunta durante una auditoría de fábrica en Taizhou. Su preocupación era simple: ¿qué números cuentan realmente como un aprobado?
Verifique la tolerancia del centro óptico midiendo el prisma inducido con un lensómetro en la posición de la pupila marcada. Según los estándares ANSI Z80.1, el desequilibrio prismático horizontal no debe exceder los 0.67 dioptrías prismáticas y el desequilibrio vertical debe mantenerse dentro de las 0.33 dioptrías prismáticas para la mayoría de las prescripciones pediátricas.
No existe un único número universal para las tolerancias de posición del centro óptico para las monturas ópticas infantiles. En cambio, diferentes normas y jurisdicciones establecen límites relacionados. El enfoque inteligente es conocer los principales y aplicar el límite más estricto que coincida con su mercado.
Los principales puntos de referencia de tolerancia
Aquí hay un resumen de las cifras de tolerancia utilizadas en la dispensación de lentes oftálmicas hoy en día:
| Norma / Fuente | Tolerancia | Qué cubre |
|---|---|---|
| Normas ANSI Z80.1 | Desequilibrio horizontal de 0,67 Δ / vertical de 0,33 Δ | Desequilibrio prismático para la mayoría de las prescripciones |
| Normas ANSI Z80.1 | ±1,0 mm | Cruz de montaje progresiva frente a DP monocular especificada |
| Normas ANSI Z80.1 | ±1,0 mm | Altura del segmento multifocal |
| Normas mínimas de Nueva Jersey | Dentro de 4 mm (prisma inferior a 0,50 Δ) | Posición del centro óptico especificada |
| Normas mínimas de Nueva Jersey | Dentro de 2 mm (prisma superior a 0,50 Δ) | Posición del centro óptico especificada |
| Tolerancias recomendadas canadienses | 0,25 Δ por lente en el punto de referencia principal | Prisma en el punto de referencia |
| Tolerancias recomendadas canadienses | Desequilibrio prismático binocular total de 0,50 Δ horizontal / 0,25 Δ vertical | Guías de dispensación comercial |
| Dentro de 5 mm del centro geométrico | Altura del centro óptico | Por qué el prisma es la prueba real |
Observe que las normas más estrictas miden el prisma, no los milímetros. Esto se debe a que
Regla de Prentice relaciona la potencia de la lente con el desplazamiento: cuanto más fuerte es la prescripción, menor desplazamiento horizontal o vertical puede tolerar una lente antes de que el 2 efecto prismático inducido supere el límite. Una lente pediátrica de +6,00 D alcanza el límite de prisma mucho antes que una lente de -1,00 D desplazada la misma distancia. Por lo tanto, cuando verifique la tolerancia, calcule siempre el prisma a partir de la desviación real de la potencia de la lente, no solo del desplazamiento físico. Algunos compradores asumen que "dentro de unos pocos milímetros" siempre es seguro. Para lentes infantiles de alta potencia, no lo es. 3 El error aceptable del centro óptico depende de la potencia de la lente, ya que la Regla de Prentice vincula el prisma inducido tanto al desplazamiento como a las dioptrías.
¿Por qué la alineación del centro óptico importa más para las monturas ópticas de los niños que para las de los adultos?
Los adultos toleran pequeños errores de centración porque sus sistemas visuales están maduros. Los niños no tienen ese lujo. Sus ojos y cerebros todavía están aprendiendo a trabajar juntos, y las gafas que inducen un prisma no deseado pueden interferir con ese proceso.
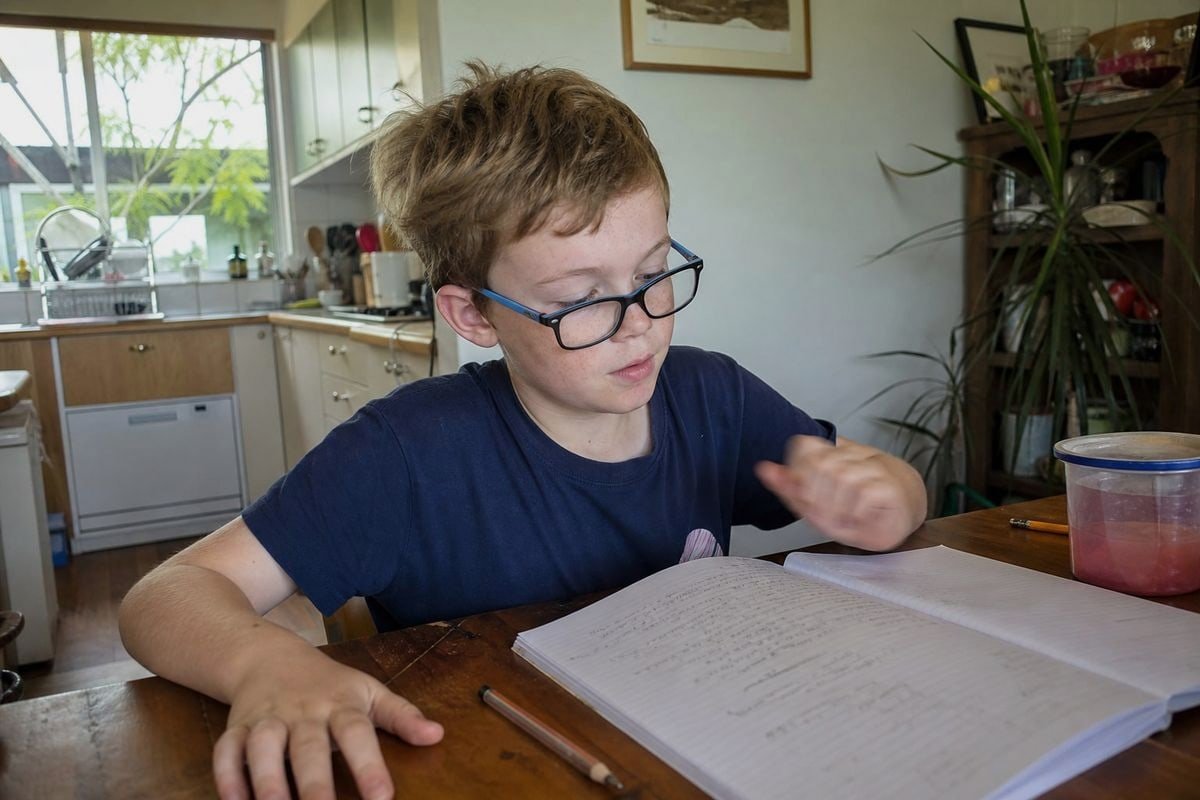
La alineación del centro óptico es más importante para los niños porque usan gafas a tiempo completo durante el desarrollo crítico de la visión binocular, no pueden describir claramente la incomodidad visual y, a menudo, tienen prescripciones muy sensibles al prisma inducido. Pequeñas desalineaciones causan dolores de cabeza, fatiga visual y menor cumplimiento.
Tres razones por las que los niños son menos indulgentes.
Primero, el tiempo de uso. Muchos niños usan lentes correctoras de la mañana a la noche. Un pequeño efecto prismático inducido que un adulto notaría durante dos horas se convierte en una carga de todo el día para un niño. Los errores de centración vertical de la lente son especialmente duros, ya que a menudo provocan dolores de cabeza y fatiga visual rápida.
Segundo, la comunicación. Un niño de seis años no puede decirle a un óptico "Veo un ligero desequilibrio vertical". Lo expresan frotándose los ojos, empujando la montura hacia arriba por la nariz o negándose a usar las gafas. Diseñamos nuestras monturas TPEE y TR90 para que permanezcan en su sitio en caras pequeñas precisamente porque el deslizamiento mueve silenciosamente los centros ópticos por debajo del eje visual.
Tercero, la sensibilidad a la prescripción. Los casos pediátricos pueden implicar potencias altas, como la afaquia, donde un desplazamiento de 1 mm en la posición de la montura puede cambiar la potencia efectiva en 0,10 D o más. Añada los materiales de las lentes: el policarbonato y el Trivex son los estándares de seguridad para niños, pero sus valores de Abbe más bajos significan que incluso pequeñas desviaciones del centro óptico producen aberración cromática notable en los bordes.
También hay un factor más nuevo. Lentes de control de miopía con.
zonas de desenfoque periférico zonas de desenfoque periférico, como los diseños DIMS o HALT, necesitan una precisión de centrado submilimétrica. Su zona de tratamiento debe estar concéntrica con la pupila, o el efecto clínico se debilita. Esta tendencia por sí sola está empujando los estándares de centrado pediátrico más estrictos de lo que jamás fueron las normas para adultos.
¿Qué rango de tolerancia debo solicitar a mi fabricante de monturas ópticas?
Los compradores que sopesan esta pregunta se enfrentan a una disyuntiva real que discutimos a menudo: las especificaciones más estrictas cuestan más en tiempo de control de calidad, mientras que las especificaciones más laxas corren el riesgo de devoluciones. ¿Dónde debe trazar la línea?
Solicite una distancia central encajonada dentro de ±1.0 mm de la especificación, altura del centro óptico dentro de ±1.0 mm, simetría entre lentes izquierda y derecha dentro de 0.5 mm, e inclinación pantoscópica cerca de cero grados. Especifique que el biselado final debe requerir un descentrado mínimo o nulo.
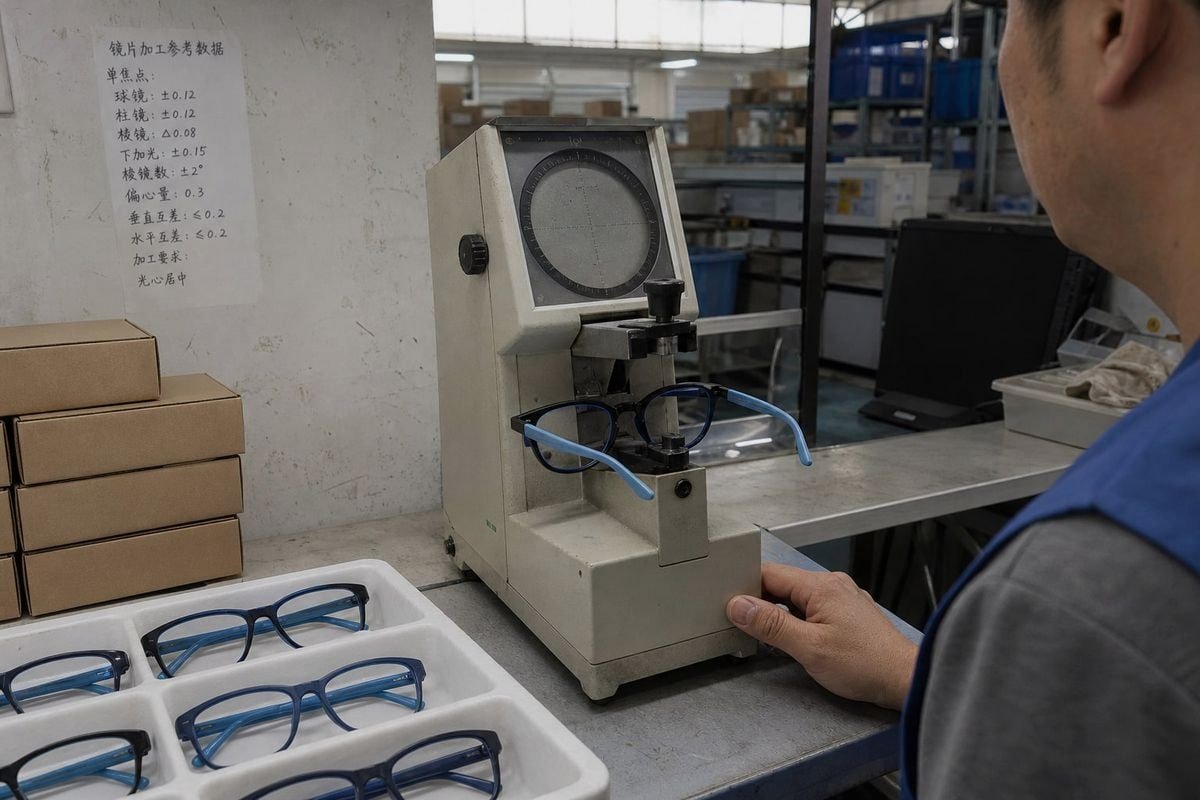
La tolerancia de la montura y la tolerancia de la lente son dos cosas diferentes, y confundirlas causa la mayoría de las disputas entre proveedores. Su laboratorio controla el centrado de la lente. Su proveedor de monturas controla si ese centrado es siquiera alcanzable. La montura distancia entre centros en caja 4 debe ser prácticamente igual al rango de PD del niño que usted apunta, para que no se requiera descentramiento al acristalar.
Una lista de verificación de especificaciones prácticas
Cuando las marcas desarrollan monturas ópticas personalizadas para niños con nosotros, recomendamos escribir estos elementos directamente en la orden de compra:
| Elemento de especificación | Tolerancia recomendada | Por qué importa |
|---|---|---|
| Distancia entre centros en caja | ±1.0 mm de la especificación | Coincide con el rango de PD objetivo, minimiza el descentramiento |
| Simetría de la apertura de la lente | Dentro de 0.5 mm izquierda/derecha | Previene la colocación desigual del PD monocular |
| ≤10 mm | 0° a 4°, se prefiere cerca de cero | El ángulo pantoscópico cero es óptimo para un niño |
| Ancho del puente y ángulo de abanico | ±0.5 mm / por dibujo | Detiene el deslizamiento en la anatomía nasal más plana |
| Longitud y ángulo de la patilla | ±1,0 mm | Mantiene la montura estable a la altura correcta |
| Curvatura de la montura | Mínima, por dibujo | El exceso de curvatura y la inclinación de la montura desplazan los centros efectivos |
Tenga en cuenta las reglas de inclinación pantoscópica
Si su diseño tiene inclinación, el centro óptico debe caer por debajo de la pupila según una regla conocida: aproximadamente 0.5 mm por cada 1° de ángulo pantoscópico, o aproximadamente 1 mm por cada 2° en algunas referencias. Algunas guías generales de dispensación incluso sugieren colocar el centro óptico de 4 a 5 mm por debajo del centro de la pupila en promedio para monturas de adultos. Para niños, adoptamos el enfoque opuesto. Diseñamos una inclinación cercana a cero en nuestra geometría pediátrica — menor ancho frontal, menor altura de cresta, menor proyección del puente y mayor ángulo de abanico — para que el centro óptico pueda ubicarse justo en la pupila sin matemáticas de compensación. Esto mantiene el acristalamiento simple para su laboratorio óptico y el centrado estable en el uso real. Para programas de alta potencia o manejo de miopía, también pregunte sobre el fresado digital de forma libre; las prescripciones compensadas ajustadas para la distancia al vértice y la inclinación pueden tensar efectivamente la tolerancia funcional más allá de los requisitos estándar de ANSI.
¿Cómo puedo verificar la precisión del centro óptico durante la inspección de calidad antes del envío?
Durante una inspección previa al envío la temporada pasada, nuestro equipo de control de calidad detectó un lote donde las aperturas de las lentes estaban desasimetricas 0.8 mm. Detectar eso antes del acristalamiento ahorró al cliente un costoso retiro.
Verificar la precisión del centro óptico midiendo la distancia entre centros en caja con una regla de PD o un proyector, comprobando la simetría de la apertura izquierda-derecha, confirmando la inclinación pantoscópica contra el dibujo, marcando los centros de las lentes de demostración para su comparación y realizando comprobaciones de simulación de uso en un maniquí de tamaño infantil.

La inspección previa al envío es donde las promesas de tolerancia se convierten en hechos medibles. En nuestro taller gestionado por 5S, realizamos controles a nivel de montura antes de que cualquier pedido salga para un cliente, porque una montura que falla en la geometría no puede ser reparada por ningún laboratorio óptico, por muy bueno que sea.
Una secuencia de inspección paso a paso
- Mida la distancia entre centros en caja. Utilice una regla calibrada o un proyector de lentes. Compare con la especificación, no con otra muestra.
- Compruebe la simetría de la apertura. Mida cada apertura de lente desde la línea central vertical de la montura. La izquierda y la derecha deben coincidir dentro de 0.5 mm, o la alineación del PD monocular se vuelve imposible durante el acristalamiento.
- Verifique la geometría vertical. Confirme la altura de la línea de referencia y compruebe que ambas aperturas estén a la misma altura. Los errores de centrado vertical de la lente inducen el tipo de prisma que los niños toleran menos.
- Confirme la inclinación pantoscópica. Coloque la montura sobre una superficie plana y mida el ángulo de inclinación. Para diseños pediátricos, debe ser cero o cercano a cero.
- Puntee y compare las lentes de demostración. Marque el centro geométrico de cada lente de demostración y compruebe la consistencia en el lote muestreado.
- Ejecute una simulación de uso. Coloque la montura en un maniquí de tamaño infantil. Compruebe que la montura no toque las mejillas ni las pestañas y que la posición de la pupila caiga en el centro de cada lente.
Muestreo y documentación
Para pedidos B2B, sugerimos un muestreo basado en AQL con controles más estrictos en las dimensiones críticas de la geometría. Registre las mediciones reales, no solo aprobados/fallidos. Cuando suministramos monturas ópticas OEM para niños de nuestros aproximadamente 800 estilos existentes, los compradores reciben informes dimensionales que pueden entregar directamente a sus socios de acristalamiento. Ese rastro de papel importa. Si un laboratorio informa más tarde desajustes en la medición de la distancia pupilar, puede demostrar si la montura o el acristalamiento lo causaron.
Conclusión
Las tolerancias de posición del centro óptico para las monturas ópticas infantiles dependen de la prescripción, se basan en el prisma y son más estrictas que las normas para adultos. Especifique claramente la geometría de la montura, inspeccione antes del envío y los problemas de centrado desaparecerán.
Notas al pie
Recurso del National Eye Institute sobre cómo se desarrollan la visión y la coordinación ocular de los niños. ↩︎
Fórmula matemática utilizada para calcular el prisma inducido a partir de la descentración de la lente. ↩︎
Explicación médica profesional de cómo funcionan la corrección prismática y el desplazamiento en las gafas. ↩︎
Estándar de la industria para medir las dimensiones de la montura y la posición de las lentes. ↩︎
Más artículos que te podrían gustar


¿Buscas un socio confiable en gafas para niños?
Explore más de 800 estilos listos y soporte OEM/ODM completo adaptado a su marca.
Ponte en contacto English
  Español de México
  Deutsch
  Français
  日本語
日本語  العربية
  Português do Brasil