Wie man eine Inspektionscheckliste beim Kauf von Kinderbrillen erstellt?
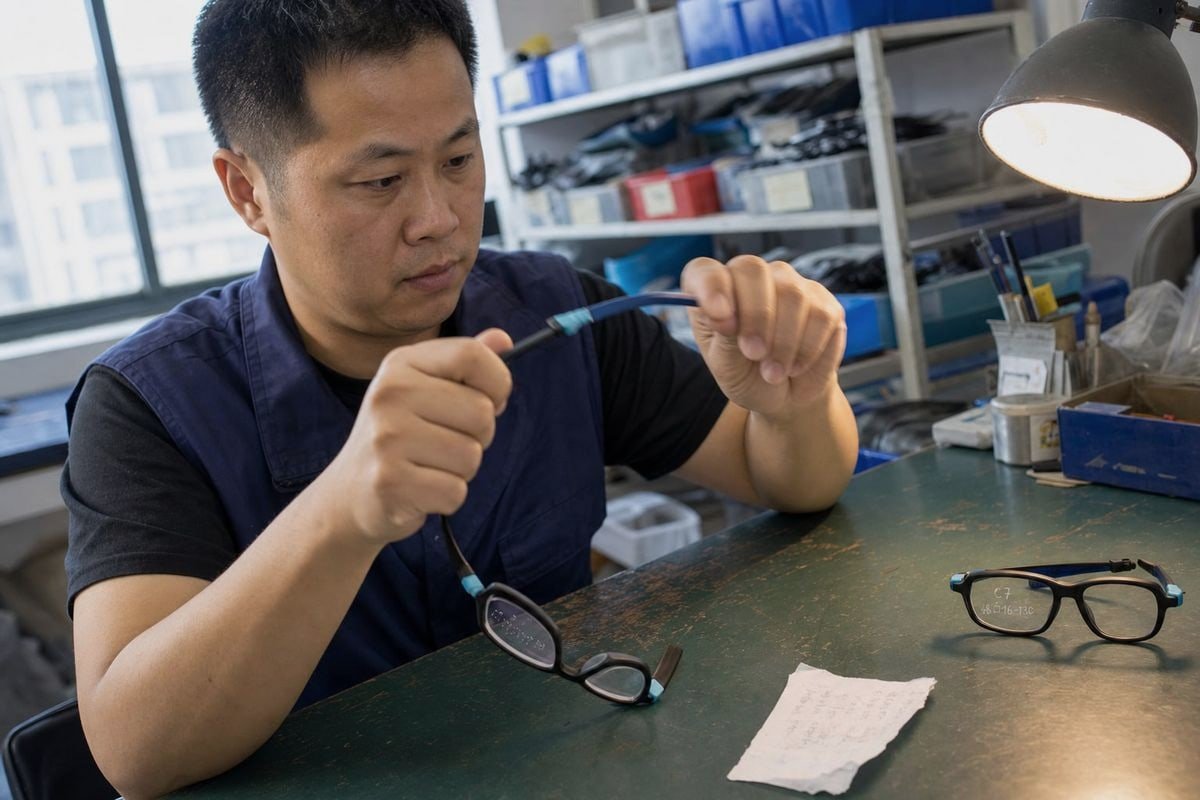
Eine Inspektionscheckliste beim Kauf von Kinderbrillen hat letztes Jahr einen unserer Käufer vor einem kostspieligen Rückruf bewahrt. Ohne eine schriftliche Checkliste rutschen kleine Mängel durch, Kinder lehnen unbequeme Fassungen ab und Retouren stapeln sich. In unserer Produktionslinie behandeln wir jeden Punkt auf der Checkliste als ein Versprechen an die Eltern, die das Endprodukt kaufen.
Um eine Inspektionscheckliste für Kinderbrillen zu erstellen, decken Sie fünf Bereiche ab: flexible und hypoallergene Materialien, Qualitätskontrolle des Lieferanten über alle Produktionsstufen hinweg, Genauigkeit der kundenspezifischen Markenbildung und Verpackung, Komfort und Passform für aktive Kinder sowie dokumentierte Bestanden/Nicht bestanden-Kriterien für Scharniere, Ausrichtung und Linsensitz.
Ich führe Sie durch jeden Abschnitt dieser Checkliste. Ich werde erklären, was zu prüfen ist, warum es wichtig ist und wie man es ohne ein optisches Labor testet.
Welche Materialmerkmale sollte ich prüfen, um sicherzustellen, dass die Fassungen flexibel und sicher für Kinder sind?
Während eines kürzlichen Entwicklungsprojekts für eine europäische Babymarke bogen unsere Ingenieure einen TR90-Musterbügel um 180 Grad, hielten ihn zehn Sekunden lang und sahen zu, wie er in seine Form zurücksprang. Dieser einzelne Test sagte dem Käufer mehr als jedes Datenblatt.
Prüfen Sie, ob die Fassungen flexible, schlagfeste Materialien wie TR90-Memory-Kunststoff oder TPEE verwenden, stellen Sie sicher, dass sie hypoallergen und frei von Blei, Phthalaten, BPA und Nickel sind, überprüfen Sie die Funktion von Federscharnieren oder flexiblen Bügeln und fordern Sie Laborberichte an, die Schlagfestigkeit und bleifreie Lackzertifizierung belegen.
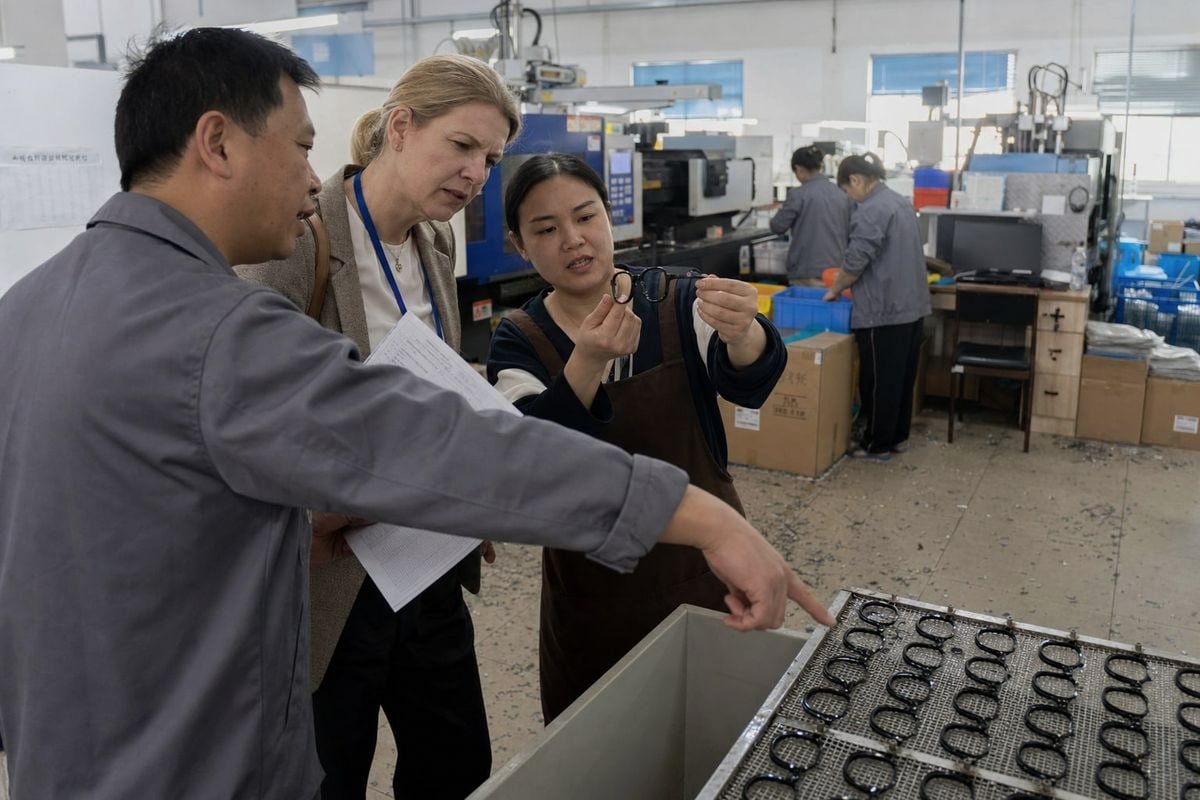
Materialauswahl ist das Fundament Ihrer gesamten Checkliste. Eine Fassung kann perfekt aussehen und ein Kind trotzdem innerhalb einer Woche enttäuschen, wenn das Polymer falsch ist. In unseren fünfzehn Jahren der Herstellung von Kinderbrillen in Taizhou haben wir gesehen, wie billige PC-Fassungen am Scharnier brachen und minderwertiges Acetat in einem heißen Auto verzogen. Ihre Checkliste sollte hier beginnen, bevor Sie sich etwas Kosmetisches ansehen.
Die Kernmaterialtests, die Sie in Ihre Checkliste aufnehmen sollten
Testen Sie zuerst die Flexibilität. TR90-Memory-Kunststoff sollte sich unter Druck biegen und in seine ursprüngliche Form zurückkehren. TPEE-Bügel sollten sich verdrehen, ohne weiß zu werden oder zu knicken. Wenn eine Probe nach einmaligem Biegen Spannungsspuren aufweist, lehnen Sie die Charge ab. Zweitens, testen Sie die Oberfläche. Fahren Sie mit dem Finger über den Innenrand und die Bügelenden. Es sollten keine rauen Stellen, scharfen Gusslinien oder Klebstoffreste vorhanden sein. Drittens, fordern Sie chemische Sicherheitsdokumente an. Hypoallergene Rahmenmaterialien 1 sind wichtig, weil Kinder dünnere, reaktivere Haut haben als Erwachsene. Fordern Sie Berichte von Drittanbietern an, die bestätigen, dass die Fassung frei von Blei, Phthalaten und Nickel ist, und fordern Sie ausdrücklich eine bleifreie Lackzertifizierung für alle beschichteten oder bedruckten Teile an.
Hier ist eine Vergleichstabelle, die Sie direkt in Ihre Checkliste übernehmen können:
| Material | Flexibilität | Gewicht | Beste Verwendung | Checklisten-Test |
|---|---|---|---|---|
| TR90 Memory-Kunststoff | Hoch, kehrt in seine Form zurück | Sehr leicht | Hauptrahmenfront | Bügel 90–180° biegen, Rückstellung prüfen |
| TPEE | Sehr hoch, kautschukartig | Leicht | Bügel, Vollrahmen aus weichem Material | Verdrehtest, auf Weißwerden prüfen |
| Standard-Acetat | Niedrig bis mittel | Mittel | Modestile, ältere Kinder | Hitzestabilitätstest, Kantenpolitur |
| Billige PC/ABS-Mischungen | Gering, spröde | Leicht | Für Kleinkinder vermeiden | Reißen normalerweise beim Biegetest |
Ein Einwand eines Käufers, den ich oft höre: Nachhaltige biobasierte Polymere klingen für Markengeschichten verlockend, aber einige recycelte Mischungen verlieren unter Hitze schneller ihre strukturelle Erinnerung. Wenn Sie sich für sie entscheiden, fügen Sie Ihrer Checkliste einen Hitzekreislauf-Test hinzu, anstatt anzunehmen, dass sie sich wie herkömmliches TR90 verhalten. Überprüfen Sie auch, ob keine kleinen abnehmbaren Teile vorhanden sind, wie z. B. lose Endkappen, die für Kinder unter drei Jahren eine Erstickungsgefahr darstellen könnten.
Wie kann ich überprüfen, ob mein Lieferant während der gesamten Produktion eine angemessene Qualitätskontrolle aufrechterhält?
Ein Einkaufsmanager aus Australien stellte mir bei einem Fabrikbesuch eine einfache Frage: "Zeigen Sie mir, wo ein defektes Gestell aufgefangen wird." Diese Frage ist genau die richtige, und Ihre Checkliste sollte jeden Lieferanten zwingen, sie schriftlich zu beantworten.
Überprüfen Sie die Qualitätskontrolle des Lieferanten, indem Sie dessen Inspektionsprozesskarte anfordern, auf Tests der eingehenden Materialien, Inprozesskontrollen bei der Formgebung und Montage sowie AQL-Inspektionen vor dem Versand prüfen und bestätigen, dass er Mängel dokumentiert, pädiatrische Brillenstandards einhält und Audits durch Dritte oder vor Ort zulässt.
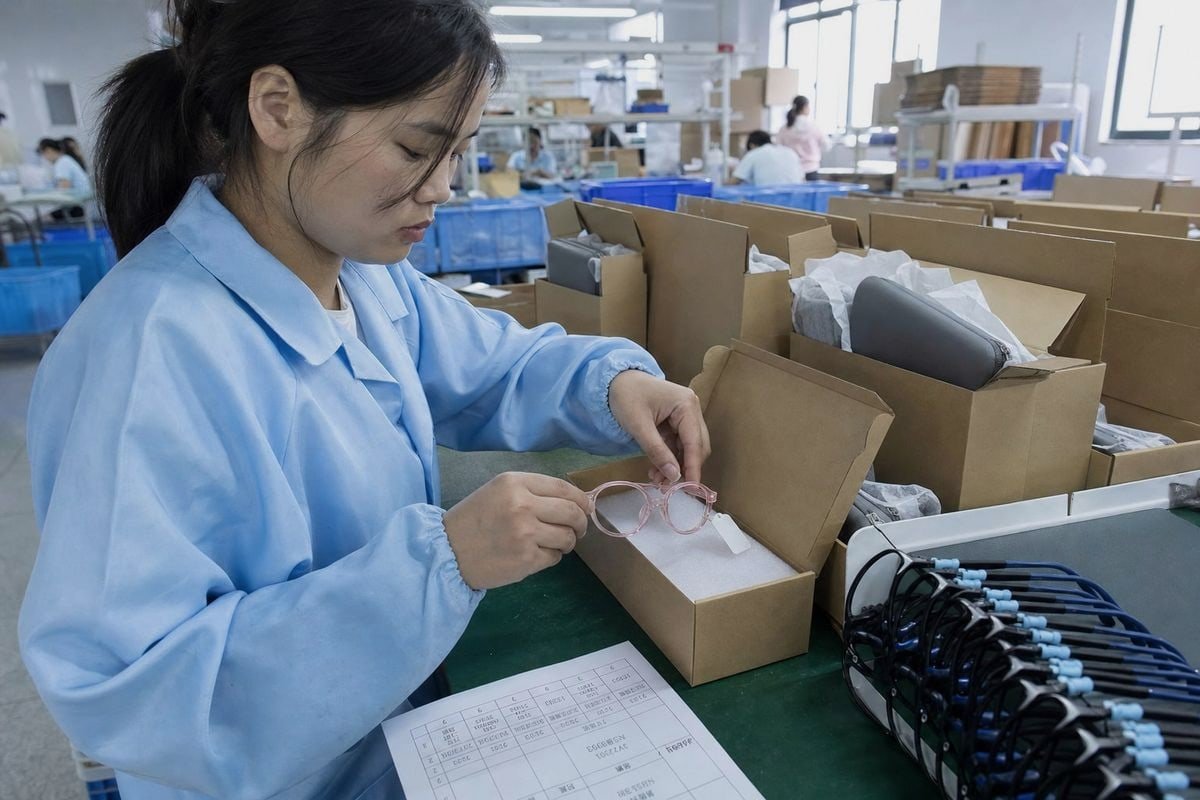
Qualitätskontrolle ist keine einzelne Inspektion am Ende der Linie. Es ist eine Kette von Kontrollpunkten, und Ihre Checkliste sollte testen, ob diese Kette tatsächlich existiert. In unserer 5S-verwalteten Werkstatt führen wir Prüfungen in vier Stufen durch, und ich empfehle Käufern, ihre Lieferanten-Verifizierungscheckliste um dieselben vier Stufen zu strukturieren.
Ein Vier-Stufen-Verifizierungsrahmen
- Eingehende Materialien. Fragen Sie, wie Rohmaterialien TR90-Pellets 2, TPEE-Verbindungen, Scharniere und Schrauben bei Ankunft inspiziert werden. Eine seriöse Fabrik testet Materialchargen vor der Formgebung, nicht nach Beschwerden.
- In-Prozess-Kontrollen. Während Spritzgussverfahren 3, sollten die Bediener auf Kurzschüsse, Blasen, Einfallstellen und Grate prüfen. Während der Montage sollten sie die Schraubenfestigkeit, die Haltbarkeit der Federscharniere und den Linsensitz überprüfen. Fordern Sie die tatsächlichen Prüfblätter an, nicht nur ein Ja.
- Endkontrolle. Vor dem Verpacken sollte jede Fassung den Vier-Punkt-Berührungstest auf einer ebenen Fläche, eine Symmetrieprüfung und einen Scharnier-Auf-Zu-Test bestehen. Scharniere sollten sich reibungslos mit gleichmäßigem Widerstand bewegen, niemals locker oder rau.
- Vorversand-Audit. Bestätigen Sie, dass der Lieferant AQL-basierte Stichproben 4 akzeptiert und Inspektionen durch Dritte begrüßt. Jede Fabrik, die sich äußeren Augen widersetzt, sagt Ihnen etwas.
Fragen Sie auch nach Compliance-Tests. Für Märkte, in denen Kinder mit ihren Brillen Sport treiben, ASTM F803-Konformität 5 ist der relevante Maßstab für die Schutzleistung, und Berichte über Schlagfestigkeitsprüfungen sollten für Linsen- und Rahmenkombinationen verfügbar sein. Nach unserer Erfahrung im Export in über zwanzig Länder sind die Marken, die langfristig erfolgreich sind, diejenigen, die uns einmal prüfen, dokumentierte Standards vereinbaren und uns dann bei jeder Bestellung daran festhalten. Diese Konsistenz ist mehr wert als ein etwas niedrigerer Stückpreis von einem nicht verifizierten Händler, da ein Händler Ihnen nicht die Spritzgussabteilung zeigen kann.
Wie sollte ich meine kundenspezifische Markenbildung, Logos und Verpackung inspizieren?
Ein falsch gesetztes Logo auf 5.000 Fassungen ist einer der schmerzlichsten Fehler in der OEM-Brillenherstellung, und ich habe miterlebt, wie er fast passiert ist. Ein Käufer Pantone-Referenz 6 und unsere gedruckte Probe sahen auf dem Bildschirm identisch aus, unterschieden sich aber im Tageslicht. Wir haben es im Stadium der Vorproduktionsmuster erkannt, und genau dort sollte Ihre Checkliste es auch erkennen.
Überprüfen Sie kundenspezifische Markierungen, indem Sie Logos anhand der genehmigten Grafiken auf Position, Größe, Farbe und Haltbarkeit vergleichen, Drucke auf Haftfestigkeit prüfen, Verpackungen auf korrekte Barcodes, Sicherheitshinweise und marktspezifische Kennzeichnungen überprüfen und sicherstellen, dass die verkaufsfertige Präsentation mit Ihrer unterschriebenen Vorproduktionsprobe übereinstimmt.
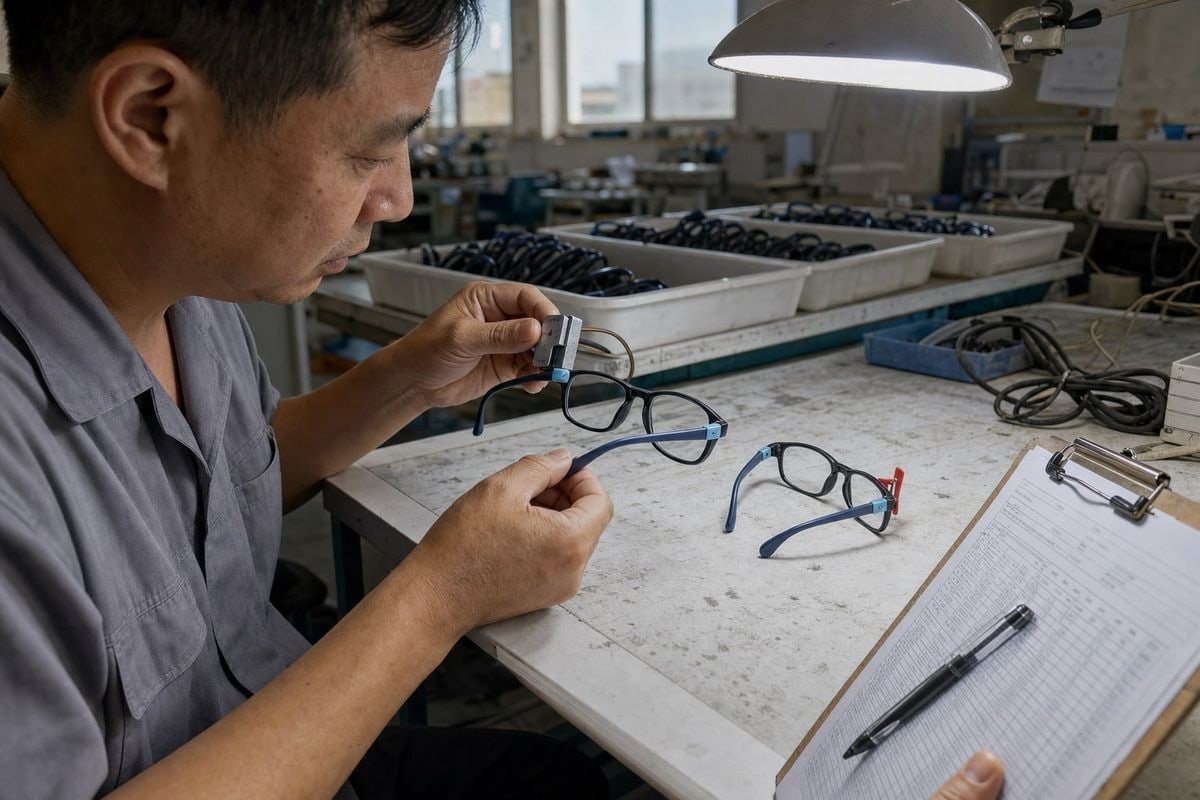
Markierungsfehler werden einem Kind nicht schaden, aber sie werden Ihrer Marke schaden. Einzelhändler lehnen Lieferungen wegen falsch gedruckter Barcodes ab, und Eltern bemerken schnell abblätternde Logos. Ihre Checkliste sollte Markierungen als funktionale Kategorie behandeln, nicht als kosmetisches Nachdenken. Bei unseren OEM/ODM-Projekten sperren wir eine unterschriebene Vorproduktionsprobe vor der Massenproduktion, und jede nachfolgende Inspektion vergleicht sich mit dieser goldenen Probe.
Logo- und Druckprüfungen
Überprüfen Sie die Logo-Position anhand der genehmigten Zeichnung mit einem einfachen Lineal. Ein Logo, das zwischen den Chargen um zwei Millimeter abweicht, signalisiert eine lockere Prozesskontrolle. Führen Sie dann einen Reibtest durch: Reiben Sie das aufgedruckte Logo fest mit einem Tuch ab, dann mit einem mit Alkohol angefeuchteten Tuch. Tampondruck- und Siebdrucklogos auf den Bügeln sollten beides überstehen. Lasergeätzte Logos sollten saubere Kanten ohne Farbverfärbungen aufweisen. Bei metallischen oder lackierten Logo-Bereichen sollten Sie dies mit Ihrer Anforderung an die bleifreie Farbzertifizierung verknüpfen, da dekorierte Oberflächen die Orte sind, an denen sich eingeschränkte Substanzen normalerweise verstecken.
Verpackungsprüfungen
Verwenden Sie eine Tabelle wie diese in Ihrer Checkliste, damit nichts übersehen wird:
| Verpackungsartikel | Was zu überprüfen ist | Bestandskriterien |
|---|---|---|
| Einzelhandelsverpackungs-Grafik | Farbe, Logo, Bildmaterial vs. genehmigter Korrekturabzug | Stimmt mit unterschriebenem Korrekturabzug bei Tageslicht überein |
| Barcode / EAN | Scannt korrekt, entspricht SKU | Scannt beim ersten Versuch, korrektes Produkt |
| Sicherheitshinweise | Altersfreigabe, marktspezifischer Text | Korrekte Sprach- und Regulierungstexte |
| Etui und Tuch | Logo-Qualität, Nähte, Sauberkeit | Keine Ausfransungen, gerader Druck, kein Geruch |
| Innenschutz | Fassung gesichert, kein Kratzerkontakt | Fassung kommt nach Schütteltest unbeschädigt an |
Ein weiterer praktischer Tipp: Bestellen Sie die vollständig verpackte Einheit als Muster vor dem Versand, nicht nur die Fassung. Eine perfekte Fassung in einer zerdrückten Schachtel führt immer noch zu Rücksendungen.
Wie kann ich sicherstellen, dass Komfort und Passform für aktive Kinder richtig sind?
Die härteste Lektion, die unser Team frühzeitig gelernt hat, war, dass Kinder Unbehagen nicht leise tolerieren; sie hören einfach auf, die Brille zu tragen oder zerstören sie. Eine Fassung, die drückt, wird in Taschen gesteckt, verdreht und verloren. Komfort ist also kein weiches Merkmal. Es ist ein Haltbarkeitsmerkmal und ein Konformitätsmerkmal.
Sorgen Sie für richtigen Komfort und Passform, indem Sie sicherstellen, dass die Fassungen waagerecht sitzen und die Pupillen zentriert sind, einen Rutschtest bei Kopfbewegungen bestehen, nach 10–15 Minuten Tragezeit keine Rötungen aufweisen, ein anatomisches Nasenstegdesign für flachere Nasen verwenden und flexible Bügelspitzen verwenden, die mit Riemen kompatibel sind.
Die Passformprüfung erfordert kinderspezifische Kriterien, da Kindergesichter keine verkleinerten Erwachsenengesichter sind. Ihre Nasenrücken sind flacher, ihre Ohren sitzen anders und sie bewegen sich ständig. Ihre Checkliste sollte die Passform so testen, wie es ein Optiker tun würde, aber mit Blick auf aktives Tragen.
Die Kern-Passformtests
Beginnen Sie mit dem Vier-Punkte-Berührungstest: Legen Sie die Fassung umgedreht auf einen flachen Tisch und stellen Sie sicher, dass alle vier Kontaktpunkte gleichmäßig aufliegen und beide Bügel parallel sind. Dies bestätigt die Ausrichtung, bevor die Fassung jemals ein Gesicht erreicht. Überprüfen Sie dann am Kind oder am Passmodell, ob die Fassung waagerecht sitzt und die Pupillen in jeder Linse einigermaßen zentriert erscheinen. Dies ist bei Myopie-Management-Gläsern noch wichtiger, da die Fassung genügend vertikale Tiefe benötigt, damit die peripheren Behandlungszonen tatsächlich vor dem Auge sitzen.
Als nächstes kommen die Bewegungstests. Lassen Sie das Kind auf den Boden schauen und dann wieder nach oben. Die Fassung sollte nicht stark verrutschen. Lassen Sie sie den Kopf seitwärts schütteln. Verstellbare Silikon-Nasenpads oder ein gut geformter Sattelsteg sollten die Fassung ohne Druck an Ort und Stelle halten. Ein anatomisches Nasenstegdesign 7, wie z. B. eine Sattel- oder Schlüssellochform, verteilt das Gewicht auf die flachere kindliche Nase, anstatt es auf zwei Punkte zu konzentrieren. Nach zehn bis fünfzehn Minuten Tragezeit nehmen Sie die Fassung ab und suchen Sie nach roten Flecken auf der Nase und hinter den Ohren. Rötungen bedeuten einen Druckpunkt, und Druckpunkte bedeuten eine innerhalb von Wochen abgelehnte Fassung.
Altersgerechte Passformanpassungen
| Altersgruppe | Nasensteg-Priorität | Bügel-Priorität | Retention-Add-on |
|---|---|---|---|
| Kleinkinder (1–3) | Weicher Sattelsteg, keine Pads | Vollständig umlaufende weiche Haken | Elastisches Kopfband |
| Schulkinder (4–9) | Anatomischer Nasensteg oder Silikonpads | Gebogene Spitzen, leichter gleichmäßiger Druck | Optional Silikon-Ohrhaken 8 |
| Aktive ältere Kinder (10+) | Verstellbare Silikon-Nasenpads | Federscharniere, griffige Bügelenden | Kompatibilität mit Sportbändern |
Die Flexibilität der Bügelenden verdient eine eigene Zeile auf Ihrer Checkliste. Die Spitzen sollten sich sanft hinter dem Ohr krümmen, und bei sportorientierten Modellen, sollten Sie die Architektur der Bügelenden überprüfen, um sicherzustellen, dass sie Silikon-Ohrhaken oder ein Sportband aufnehmen können, ohne das Gestell aus dem Gleichgewicht zu bringen. Unsere zweifarbigen TPEE-Bügelenden mit Silikon-Scharnierverbindungen wurden genau aus diesem Grund entwickelt: Der Halt kommt vom Materialdesign, nicht vom Zusammendrücken des Kinderkopfes. Berücksichtigen Sie schließlich sensorisch empfindliche Kinder. Eine matte oder soft-touch Oberfläche verbessert oft die Tragebereitschaft bei Kindern, die glänzenden Kunststoff als hautreizend empfinden.
Schlussfolgerung
Eine schwache Checkliste lässt Defekte, Unbehagen und Branding-Fehler zu den Eltern gelangen, und Rücksendungen folgen schnell. Eine strukturierte verhindert alle drei. Ich habe das genaue Gerüst geteilt, das wir verwenden: flexible, hypoallergene Materialien mit echten Testberichten prüfen, die Qualitätskontrolle in jeder Produktionsstufe auditieren, das Branding gegen ein unterschriebenes goldenes Muster sperren und die Passform so testen, wie Kinder Brillen tatsächlich tragen. Bauen Sie Ihre Inspektionscheckliste für Kinder-Optikrahmen um diese vier Säulen auf, wenden Sie sie auf jede Bestellung an und verwandeln Sie Qualität von einer Hoffnung in einen wiederholbaren Prozess. Wenn Sie einen Partner suchen, der bereits auf diese Weise inspiziert, teilt unser Team gerne unsere internen Checklisten als Ausgangspunkt mit Ihnen.
Fußnoten
Diese NIH-Studie untersucht die dermatologische Sicherheit und Kontaktdermatitis im Zusammenhang mit Materialien, die in Brillengestellen verwendet werden. ↩︎
EMS-Grivory ist der Originalhersteller von Grilamid TR90, dem Industriestandard für flexible, Hochleistungs-Brillenpolymere. ↩︎
Spritzguss ist der primäre Herstellungsprozess zur Herstellung haltbarer und komplexer Kunststoff-Brillenkomponenten. ↩︎
Der akzeptable Qualitätsgrenzwert (AQL) ist die standardmäßige statistische Stichprobenmethode, die in der Fertigung für Qualitätskontrollinspektionen verwendet wird. ↩︎
Weitere Artikel, die Ihnen gefallen könnten

Auf der Suche nach einem zuverlässigen Partner für Kinderbrillen?
Entdecken Sie über 800 sofort verfügbare Modelle und umfassenden OEM/ODM-Support, der auf Ihre Marke zugeschnitten ist.
Kontakt aufnehmen English
  Español de México
  Deutsch
  Français
  日本語
日本語  العربية
  Português do Brasil