How to Ask Suppliers to Label Sizing for Kids Optical Frames?
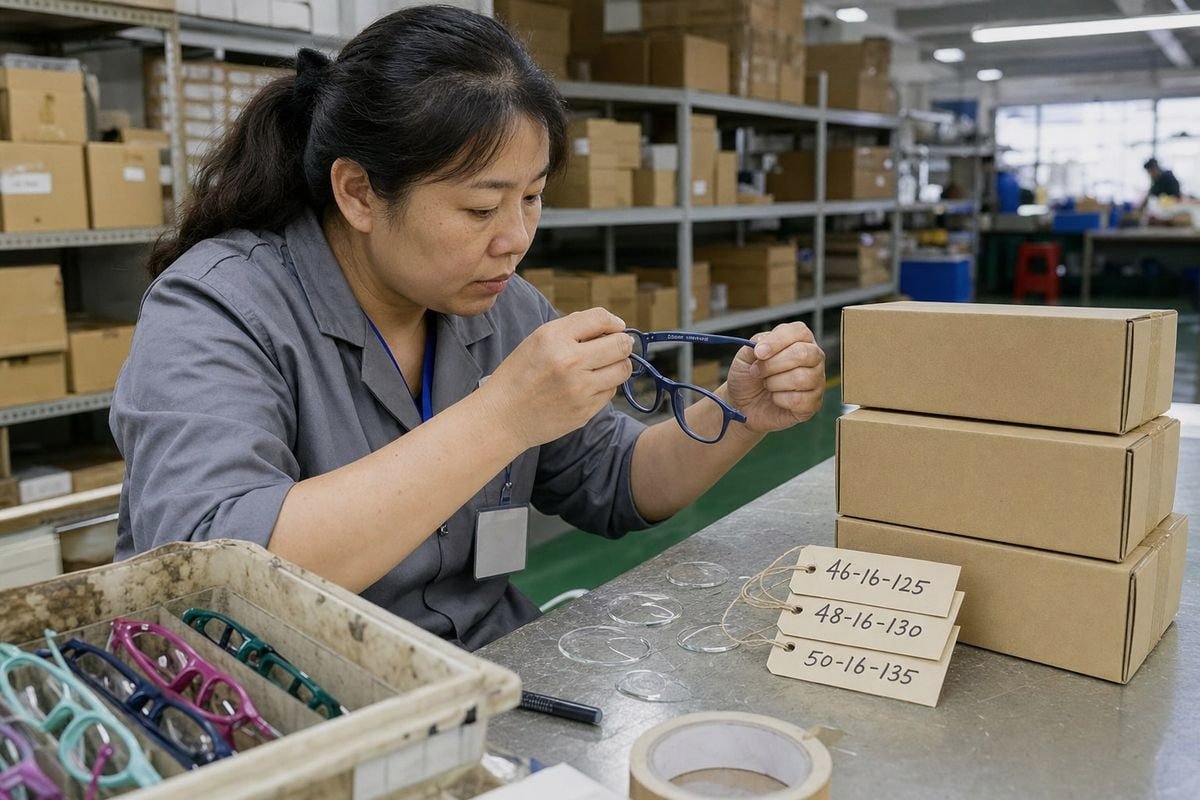
Asking suppliers to label sizing for kids optical frames sounds simple, yet on our production line in Taizhou, vague sizing requests cause more rework than almost any other spec issue.
To ask suppliers to label sizing for kids optical frames, request the three-number format (lens width, bridge width, temple length) printed inside the temple, plus an age range, total frame width, and model code — and require identical size codes on samples, cartons, and hang tags.
That is the short answer. Below, I will walk you through the standards to reference, how to phrase your request, where labels should sit, and what to check before approval.
What Sizing Standards Should I Reference When Requesting Labels from My Supplier?
A buyer from Australia once emailed us asking for "kids size, please label it." Our team had to send three follow-up questions before we could even quote. Standards matter because they remove that back-and-forth.
Reference the international three-number system — lens width, bridge width, and temple length in millimeters — as your baseline. Then add age-specific sizing bands, total frame width, and, for regulated markets, compliance-oriented labeling requirements such as CPSIA documentation for children's products sold in the US.

The three-number format is the universal language of eyewear. You will see it stamped inside almost every adult frame. For children's eyewear, it is necessary — but not sufficient. Kids' faces are not scaled-down adult faces. Their nose bridges are flatter, their ears sit differently, and their pupillary distance is narrower. So your labeling standard should combine objective frame measurements with fit context.
The Three Core Numbers
Each number describes one dimension. Ask your supplier to confirm all three come from actual sample measurements, not catalog estimates. In our experience, catalog numbers can drift 1–2 mm from production reality, and on a child's face that drift is noticeable.
| Measurement | What It Means | Typical Kids' Range |
|---|---|---|
| Lens width | Horizontal width of one lens | 38–48 mm |
| Bridge width (DBL) | Gap between the two lenses | 14–17 mm |
| Temple length | Hinge to temple tip | 115–135 mm |
Age Bands as a Secondary Layer
Age-specific sizing helps retail buyers and parents who cannot decode millimeters. Common bands include 0–1, 1–2.5, 2.5–4, 4–7, 7–10, and 10–16. One widely used reference maps roughly 41–46 mm lens widths to ages 4–6 and 46–48 mm to ages 7–9. Ask your supplier to map every SKU to a band, but keep the millimeter data as the authoritative record.
Compliance References
If you sell in the US, children's products fall under CPSIA compliance, which affects testing and tracking labels. European and Australian markets have their own labeling regulations. Confirm your supplier can support third-party test reports and material certificates alongside the size marking itself.
How Do I Communicate Age-Based Fit Requirements Clearly to a Frame Manufacturer?
There is a trade-off we weigh constantly at our factory: age labels are easy for consumers to shop by, but measurements are what actually determine fit. The best briefs we receive from buyers handle both.
Communicate age-based fit by sending a written specification sheet that pairs each age band with exact frame measurements, a recommended pupillary distance range, and a fit note. Ask the manufacturer to confirm each mapping against physical samples, not just a sizing chart PDF.

A casual email like "these are for 5-year-olds" leaves too much open. Different factories interpret age bands differently. When we develop TR90 kids optical frames 1 with TPEE temples for brands across 20+ countries, the smoothest projects always start with a spec sheet that translates age into numbers.
Build a Spec Sheet, Not an Email Thread
Your spec sheet should include the model code, target age group, the three frame measurements, total frame width, recommended pupillary distance range, material, and label format. Here is a simple structure we recommend to buyers:
| Age Band | Lens Width | Bridge Width | Temple Length | PD Range | Fit Note |
|---|---|---|---|---|---|
| 4–6 | 41–44 mm | 14–15 mm | 120–125 mm | 48–54 mm | Narrow bridge, flexible temples |
| 7–9 | 44–46 mm | 15–16 mm | 125–130 mm | 52–58 mm | Standard bridge |
| 10–13 | 46–48 mm | 16–17 mm | 130–135 mm | 56–62 mm | Wide fit, active wear |
Handle the Age-vs-Measurement Objection Head-On
Some buyers push back: "Age labels alone are simpler for our retail customers." I understand the appeal, but age alone is the number one cause of fit complaints we see in returned samples. Children of the same age vary enormously in face width and bridge shape. The fix is not to abandon age labels — it is to anchor them. Print the measurements as the primary label and present the age band as guidance. Also ask about adjustable elements. Frames with flexible TPEE temples 2 or curved ear-grip tips forgive small mismatches and extend usable life as the child grows — but they should never be sold as "frames to grow into," which dispensing guidance consistently warns against.
Confirm Manufacturing Capability
Ask directly: "Can you print or laser-engrave the size on this material?" Soft rubber temples and rigid acetate accept markings differently. We laser-mark TR90 easily; soft TPEE sections sometimes need pad printing or a molded-in mark instead.
Where Should Size Markings Be Placed on the Frame for Easy Reading?
During a QC round last year, our inspectors caught a batch where the size print sat under the temple's rubber overlay — technically present, practically invisible. Placement is not a detail. It decides whether the label gets used.
Place the primary size marking on the inside of the temple arm, where opticians and parents expect it. Support it with a demo lens sticker or hang tag for retail visibility, and matching size codes on the inner box and outer carton for logistics.

The inside temple is the industry convention for a reason. Opticians read it in seconds, and parents replacing outgrown glasses can check the old pair's numbers instead of guessing by age. But children's eyewear adds complications that adult frames do not have.
Material Dictates the Marking Method
Rigid materials like acetate and TR90 take laser engraving or pad printing cleanly. Soft, flexible sections — like the TPEE temples we build for active kids — can stretch and distort printed text over time. On two-tone designs, such as a navy-and-black rubber temple with looped ear tips, we usually recommend marking the rigid TR90 section near the hinge, or molding the size directly into the tooling so it never wears off.
Layer the Labels by Audience
Different people read size information at different moments. One mark cannot serve them all.
| Location | Who Reads It | What It Should Show |
|---|---|---|
| Inside temple arm | Opticians, parents | Full three-number size + model code |
| Demo lens sticker | Retail shoppers | Age band + fit category |
| Hang tag | Retail shoppers, staff | Size, age band, material, brand |
| Inner box label | Warehouse, customer service | Size code, model, color, barcode |
| Outer carton | Importers, 3PL | Size code, quantity, model range |
Keep One Code Across All Layers
The most damaging error is inconsistency: a sample marked 44-16-125, a carton marked "M," and a product page saying "ages 7+." Require your supplier to commit to one size designation that repeats identically at every layer, and ask for photos of the marking on the physical sample — never approve from a PDF mockup alone.
What Details Should I Confirm Before Approving the Final Sizing Label Layout?
A lesson we learned the hard way: a European buyer once approved a label layout quickly, and only at pre-shipment inspection did anyone notice the temple length was printed from an older tooling revision. Approval is where sizing problems are cheapest to fix.
Before approving, verify labeled measurements against a physically measured master sample, confirm the same size code appears on frame, packaging, and product data, check age bands match your sizing charts, and confirm compliance markings and durability of the print itself.

Approval should be a structured process, not a quick thumbs-up. Here is the sequence we walk buyers through before bulk production begins.
The Pre-Approval Checklist
- Measure the master sample yourself. Use calipers on lens width, bridge width, and temple length. Compare against the printed label. Tolerance should stay within about 1 mm.
- Cross-check every label layer. Frame marking, demo lens sticker, hang tag, inner box, outer carton, and your e-commerce product data must all carry the same size code.
- Validate the age band. Confirm the labeled age range matches your own sizing charts and the PD guidance you plan to publish.
- Test label durability. Rub the marking, flex the temple, and if possible run a sweat or alcohol wipe test. Kids' frames live rough lives; a size mark that rubs off in three months is useless for reorders.
- Confirm compliance elements. For the US, check that CPSIA tracking label requirements are met; for other markets, confirm local labeling regulations for children's eyewear are covered by test reports and certificates.
- Request multiple pre-production samples for customized frames. Sizing can vary slightly between batches, and two or three samples reveal that variation before it reaches your warehouse.
Digital Data Is Part of the Label Now
Increasingly, buyers ask us for digital sizing data alongside physical labels — measurement tables for product pages, and dimension files compatible with AR virtual try-on tools. If online retail matters to you, confirm this capability at the same approval stage. It costs nothing to ask early and a great deal to retrofit later.
Finally, document the approved layout with photos and a signed spec sheet. That record becomes your reference for every reorder, so batch two matches batch one exactly.
Conclusion
Vague sizing quietly drives returns and fit complaints. Ask suppliers for measured three-number labels, anchored age bands, consistent placement, and verified approval — and your kids optical frames will fit, sell, and reorder cleanly.
Footnotes
1. Found an article that compares TR90 and acetate frames, explicitly mentioning their suitability for kids, aligning with the original link’s context. ↩︎
2. The original article comparing TPEE and TR90 materials for kids’ eyewear is now available at a working URL on the same domain. ↩︎
More Articles You Might Like

August 5, 2026
Bio-Based vs Regular Cellulose Acetate: What's the Difference for Kids' Frames?

August 5, 2026
How Recyclable Are Kids' Optical Frame Materials, and What Eco-Friendly Alternatives Exist?

August 5, 2026
Do Kids Optical Frames Whiten or Age in Storage, and How to Control Warehouse Conditions?
Looking for a Reliable Kids Eyewear Partner?
Explore 800+ ready styles and full OEM/ODM support tailored to your brand.
Get in Touch English
  Español de México
  Deutsch
  Français
  日本語
日本語  العربية
  Português do Brasil